 Tweet
Tweet
I removed the centre console on my NP pajero on the weekend and i searched the froum for instuctions on how this is done. I was able to find some good info but no pictures. I know picture speaks a thousand words, and i am use to article like this over on the NEwtrion.net forum.
So here goes Step to step guide on how to remove the centre console on a 2005 model Auto NP Pajero
Depending on what options you have Six disc CD player etc. few of these steps might change.
Tools Needed: Flat blade screw driver (or similar flat thin object) Phillips head screw driver (medium size, medium length) and a soft cloth to cover the flat blade screw driver when unclicking things so you don't mark anything.
Attention: Whenever i am pulling apart bits and pieces or removing/changing components I always remove the negative terminal on the battery. This prevents any accidental and costly electrical shorts
Step 1
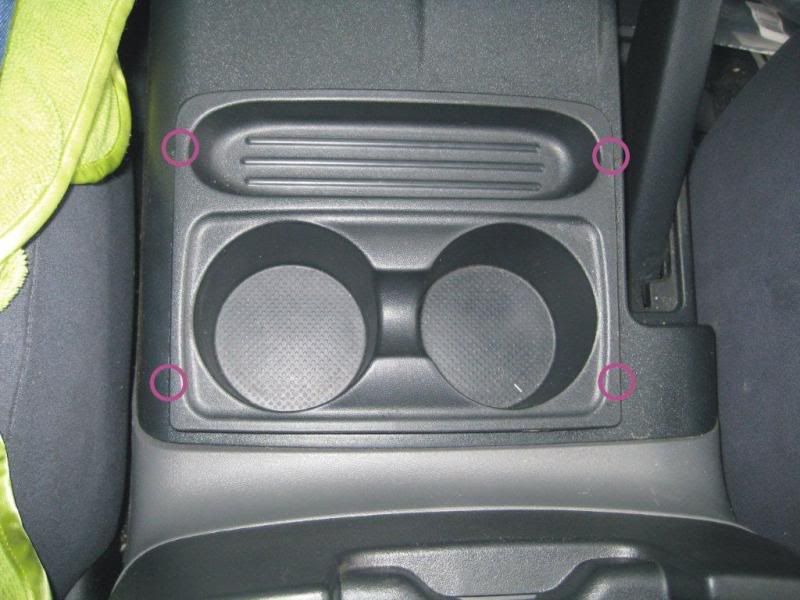
Remove the cup holder in the centre console. There are four clips holding it in place (circled in the picture) use a cloth covered flat blade screw driver (or similar flat thin object) and click out one corner and then the other on the same side. The cup holder should now pull out.
Step 2
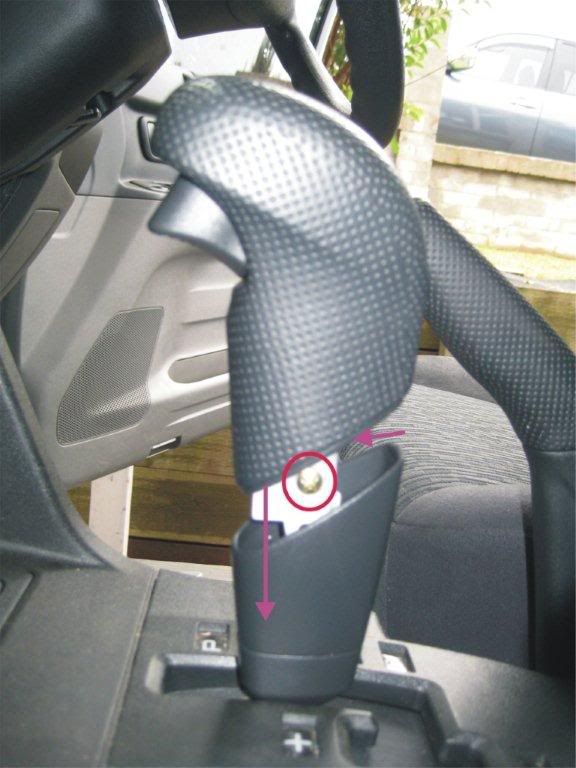
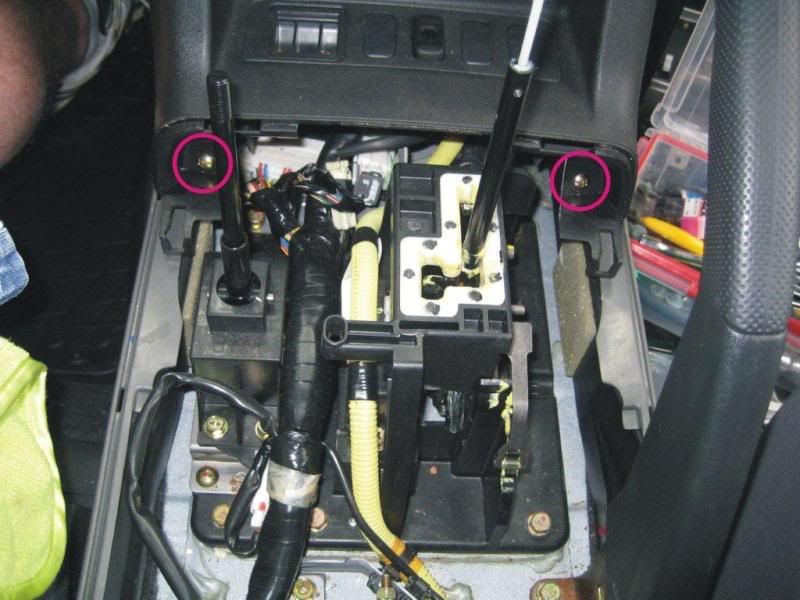
Unscrew the 4WD activation Lever and then Slide bottom section of Auto Lever to reveal two screws (as shown in picture) remove screws and slide off Lever.
Step 3
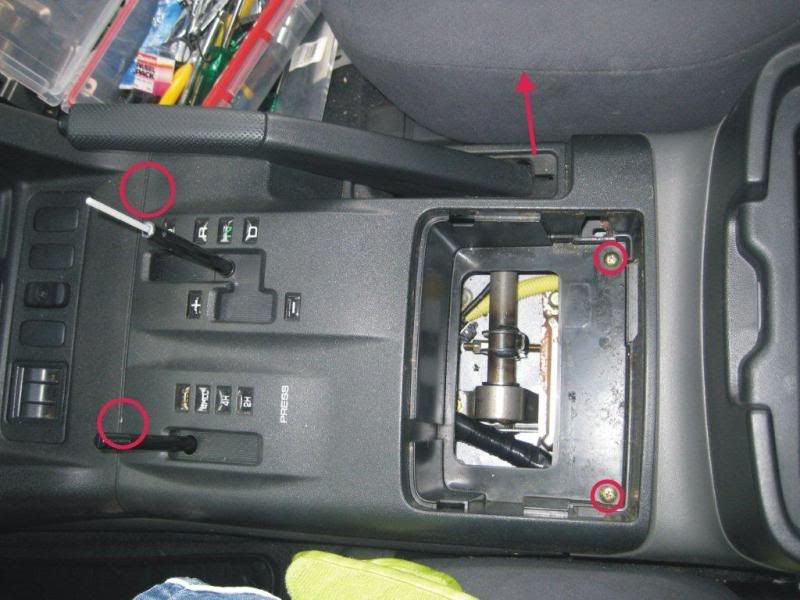
Remove the two screws under the cup holder (circled in picture) and clip off Hand brake surround. Now lift up the cover and unplug the cable for the lights for the 4wd leaver. You can gently pull backwards to remove cover. The cover is held in with two clips (shown in picture) they should release pretty easy.
Step 4
From here you can access under the arm rest/storage compartment or move further forward into the centre console. I chose to remove the arm rest/compartment next.
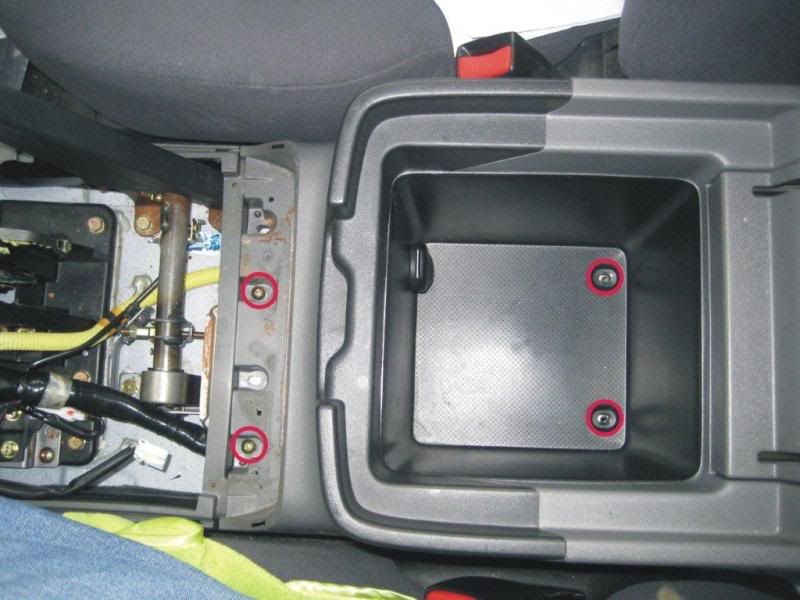
Remove the two screws inside the storage compartment and the two screws holding the front of the Armrest/storage compartment. (shown in picture). Lift up the Armrest/storage compartment carefully and unplug any cables ie. Power Socket etc.
Step 5
Now we remove the front part of the centre console. Remove the two screws holding the lower part of the surround. (shown in picture). And lift up the surround and unplug any cables ie. Cigarette Lighter, Stability Control etc. You can now remove the surround.
Step 6
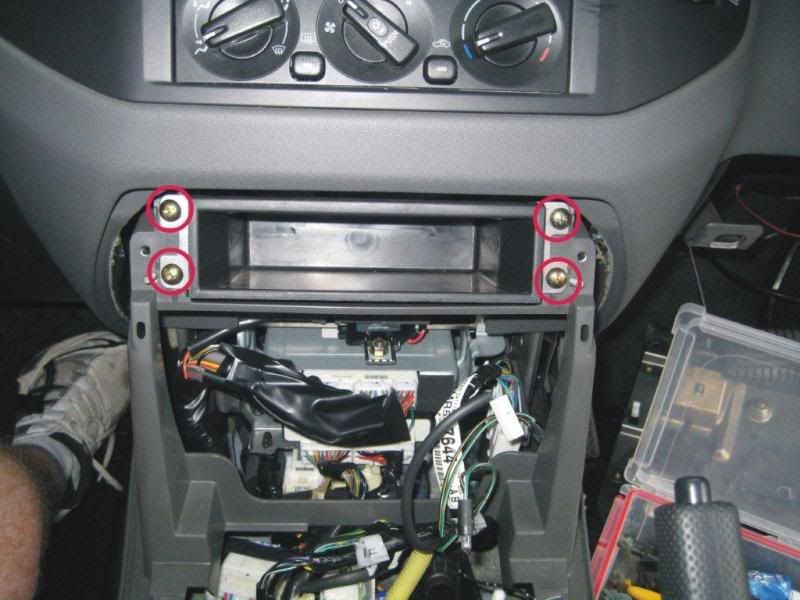
You will now either remove your six disc CD player or storage pocket which is what I have. To do this unscrew the four screws holding it in place. Obviously if it’s the CD player unplug any cables.
Step 7
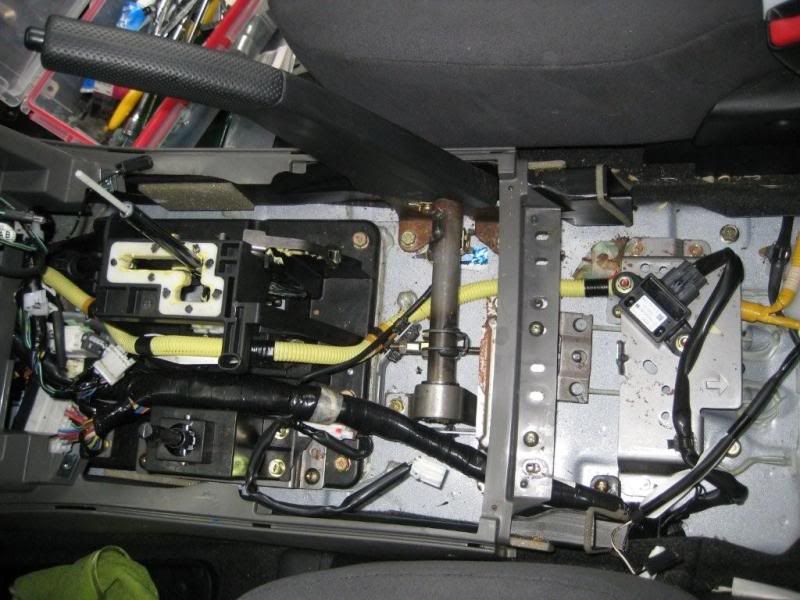
Now you can remove the last piece of the centre console. To do this unscrew the two screw at the back of t he console ( shown in picture)
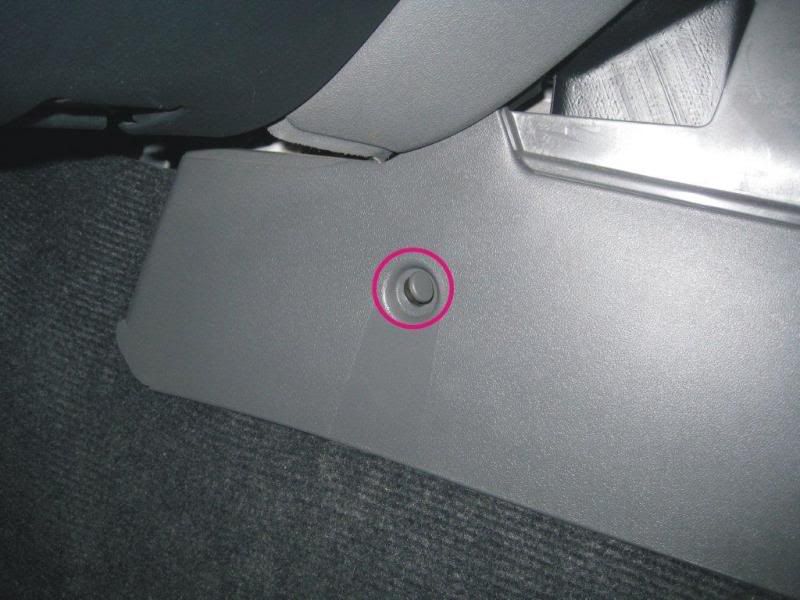
And remove the two screws on either side of the console in the foot well. Flick off the plastic cover and unscrew.
You have now removed the entire centre console. Have fun working on your 4WD
I have written this as a helpful guide for others who wish to remove the centre console on their Pajero’s.
I take no responsibility for anything happening while following my instructions. Things will differ between models so use this as a guide only.
If i have forgotten anything let me know and i will fix it up.
So here goes Step to step guide on how to remove the centre console on a 2005 model Auto NP Pajero
Depending on what options you have Six disc CD player etc. few of these steps might change.
Tools Needed: Flat blade screw driver (or similar flat thin object) Phillips head screw driver (medium size, medium length) and a soft cloth to cover the flat blade screw driver when unclicking things so you don't mark anything.
Attention: Whenever i am pulling apart bits and pieces or removing/changing components I always remove the negative terminal on the battery. This prevents any accidental and costly electrical shorts
Step 1
Remove the cup holder in the centre console. There are four clips holding it in place (circled in the picture) use a cloth covered flat blade screw driver (or similar flat thin object) and click out one corner and then the other on the same side. The cup holder should now pull out.
Step 2
Unscrew the 4WD activation Lever and then Slide bottom section of Auto Lever to reveal two screws (as shown in picture) remove screws and slide off Lever.
Step 3
Remove the two screws under the cup holder (circled in picture) and clip off Hand brake surround. Now lift up the cover and unplug the cable for the lights for the 4wd leaver. You can gently pull backwards to remove cover. The cover is held in with two clips (shown in picture) they should release pretty easy.
Step 4
From here you can access under the arm rest/storage compartment or move further forward into the centre console. I chose to remove the arm rest/compartment next.
Remove the two screws inside the storage compartment and the two screws holding the front of the Armrest/storage compartment. (shown in picture). Lift up the Armrest/storage compartment carefully and unplug any cables ie. Power Socket etc.
Step 5
Now we remove the front part of the centre console. Remove the two screws holding the lower part of the surround. (shown in picture). And lift up the surround and unplug any cables ie. Cigarette Lighter, Stability Control etc. You can now remove the surround.
Step 6
You will now either remove your six disc CD player or storage pocket which is what I have. To do this unscrew the four screws holding it in place. Obviously if it’s the CD player unplug any cables.
Step 7
Now you can remove the last piece of the centre console. To do this unscrew the two screw at the back of t he console ( shown in picture)
And remove the two screws on either side of the console in the foot well. Flick off the plastic cover and unscrew.
You have now removed the entire centre console. Have fun working on your 4WD
I have written this as a helpful guide for others who wish to remove the centre console on their Pajero’s.
I take no responsibility for anything happening while following my instructions. Things will differ between models so use this as a guide only.
If i have forgotten anything let me know and i will fix it up.


 If I agreed with you, then we would both be wrong
  '89 NG Paj, 3L V6, now running 2" suspension lift, 33" Micky T Baja Claws's, Front LOKKA & 12,000lb winch
Comment