 Tweet
Tweet
mate , things are tough over there, I got my original pajeros rims sandblasted & powdercoated for $245!.
-
NS shorty 3.8l petrol with winch, front/rear E-lockers
NT shorty 3.2l tdi, pretty stock with rear locker -
Sorry that price is for a wheel refurbishment. They would split the bolts and paint the wheel components individually.
I think it's about ?40-50 to powder coat a standard wheelComment
-
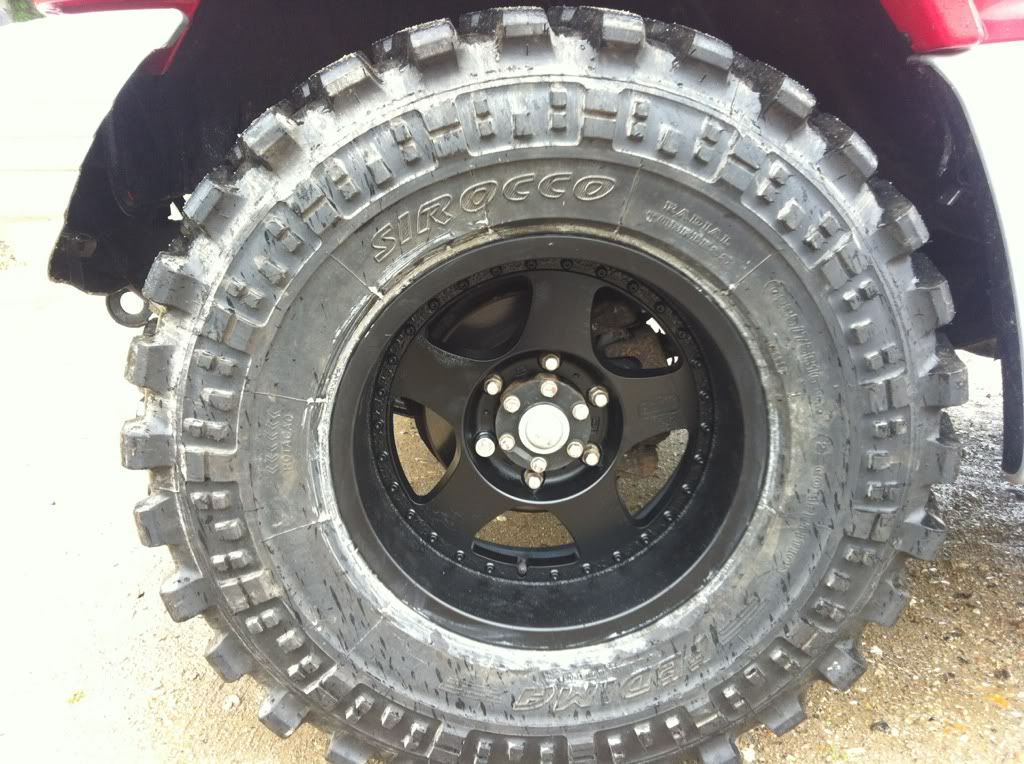
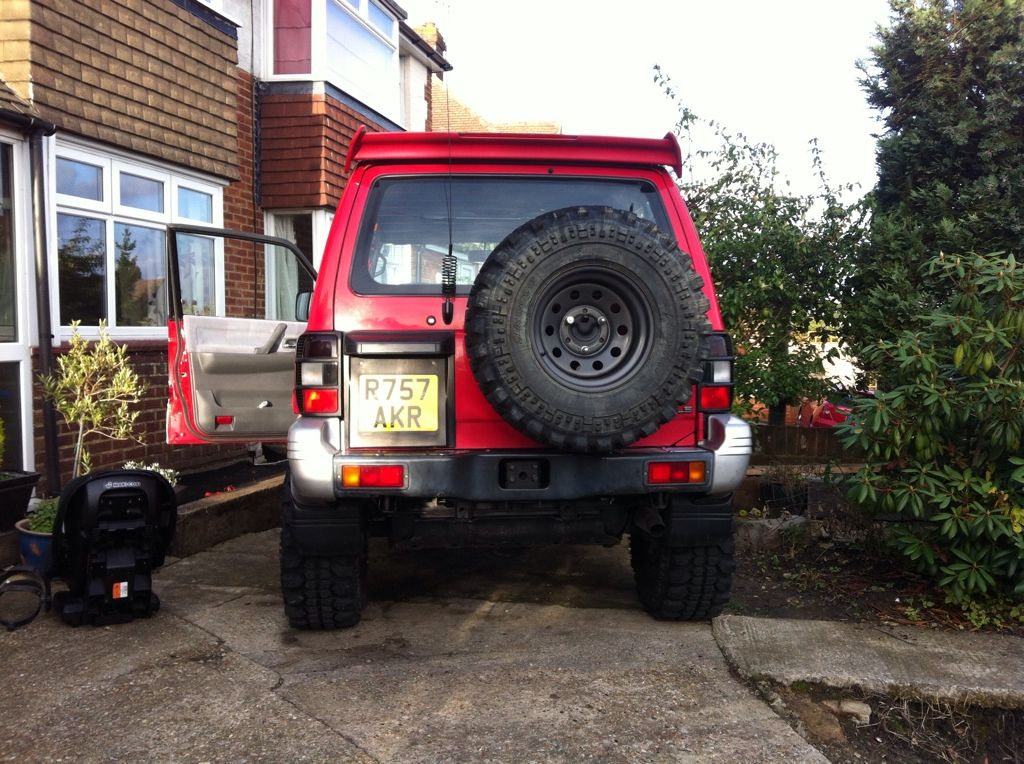
Had wheels fitted today. Made loads of difference going over to the alloy wheels.
The offset is -27, which is a huge improvement of -5mm compared to the -32 steels. Wheels at still sticking out
Biggest improvement is the weight difference in the wheels. Has improved the drivability of the car by loads.
Looks bad ass though.
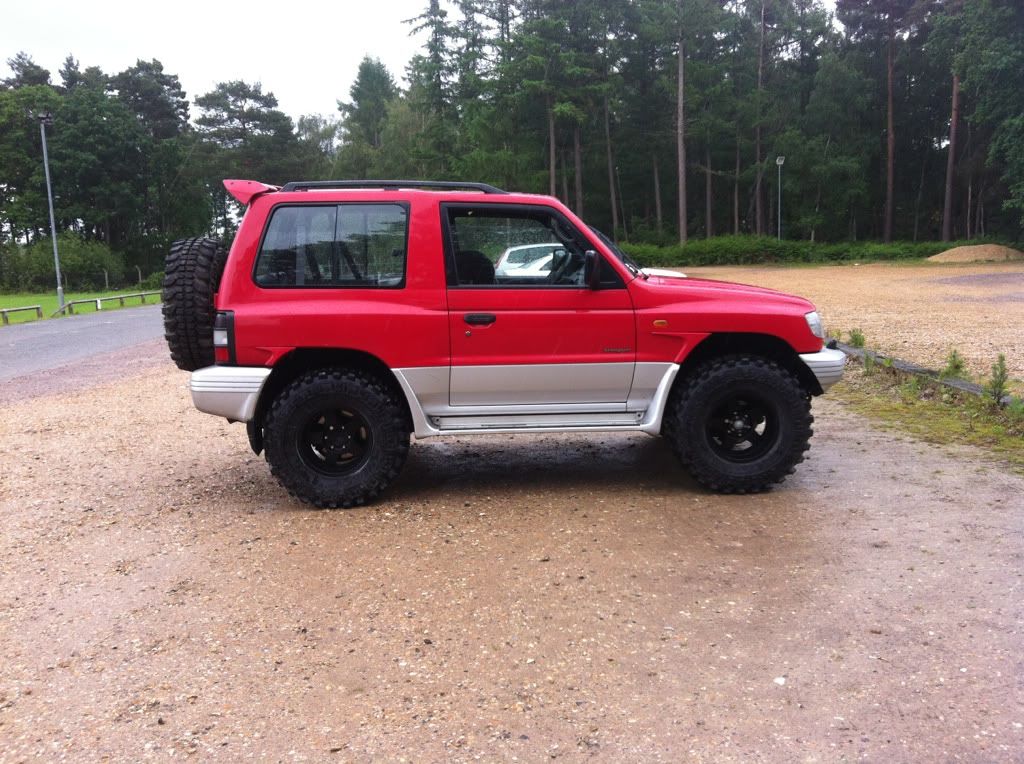
I have a 1 inch body lift Im thinking of buying as its cheap so I'll be heading down that road soon.
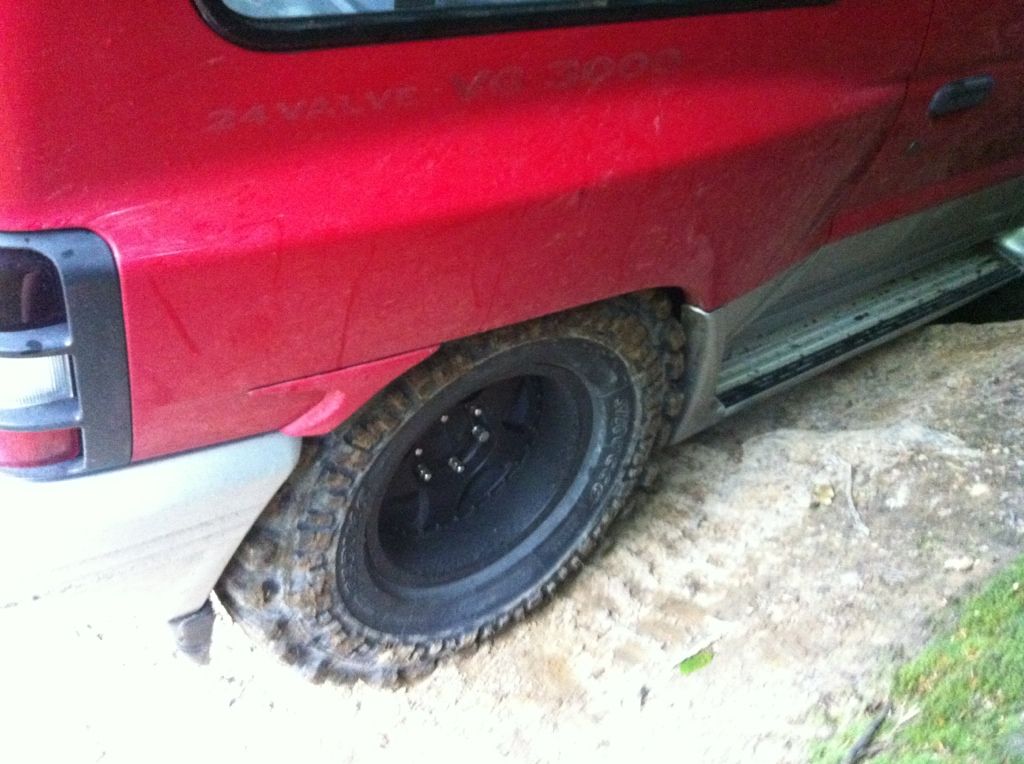
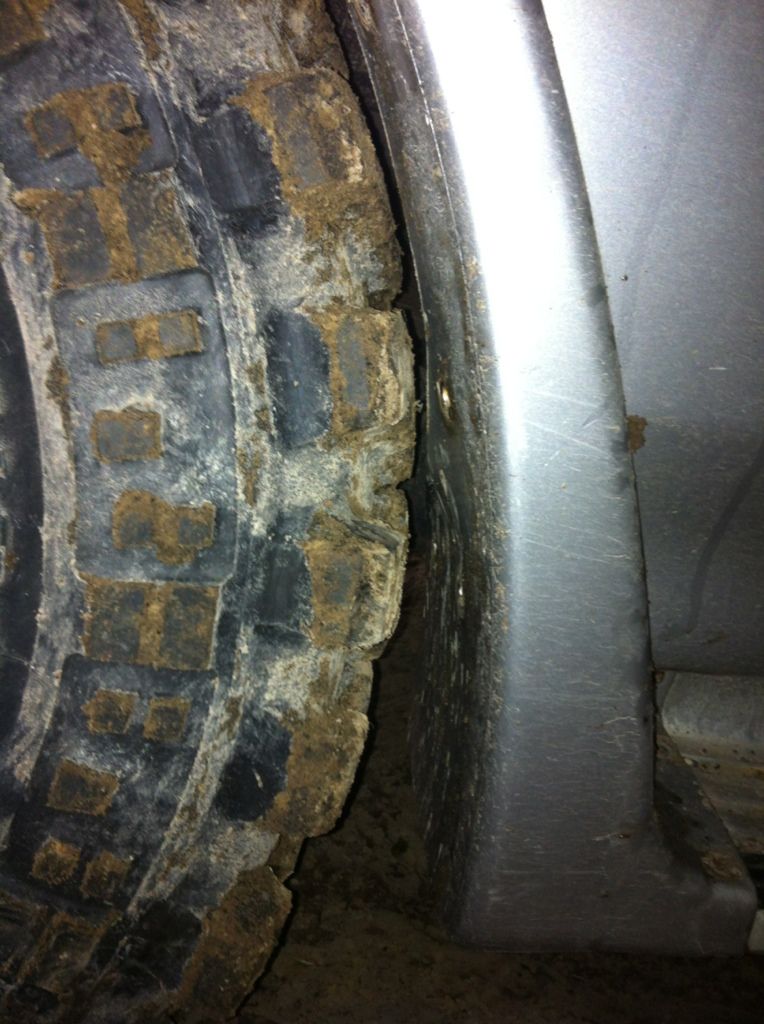
Also gonna go play at a site on Sunday so should be able to find out what's rubbing in the arches.Comment
-
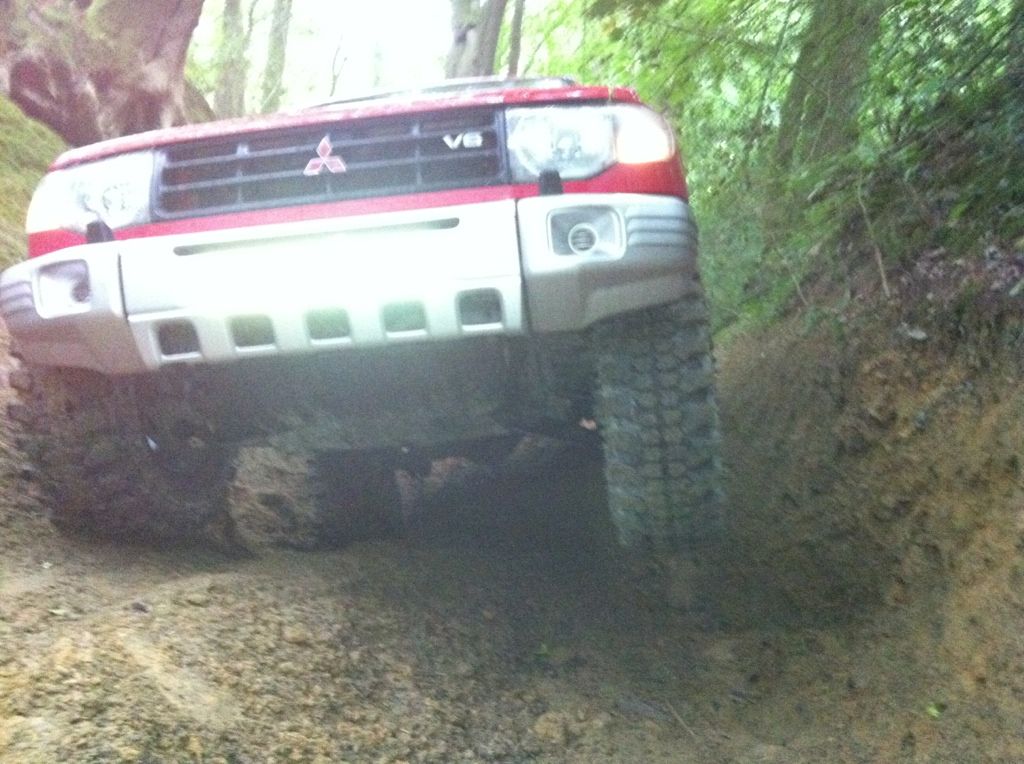
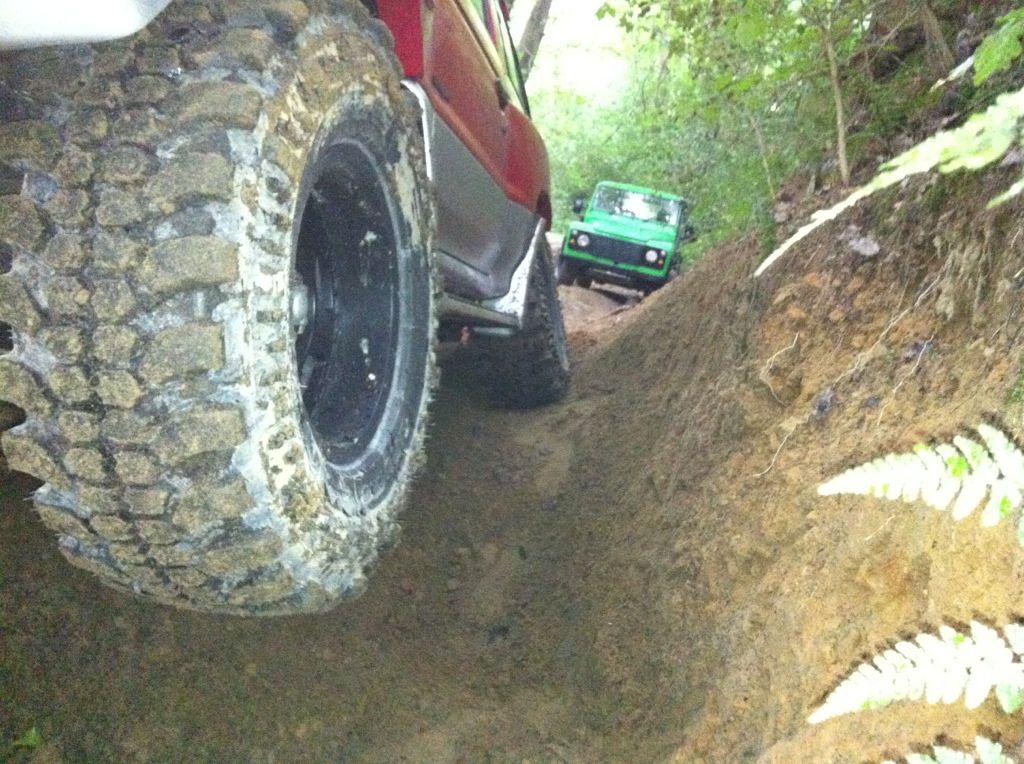
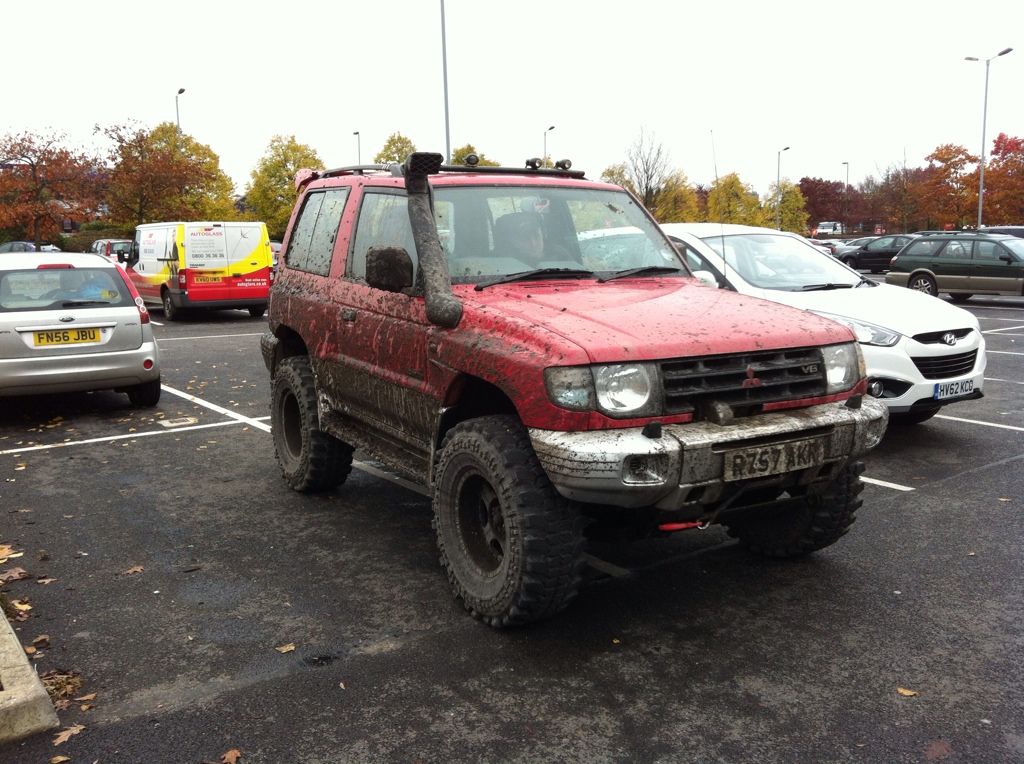
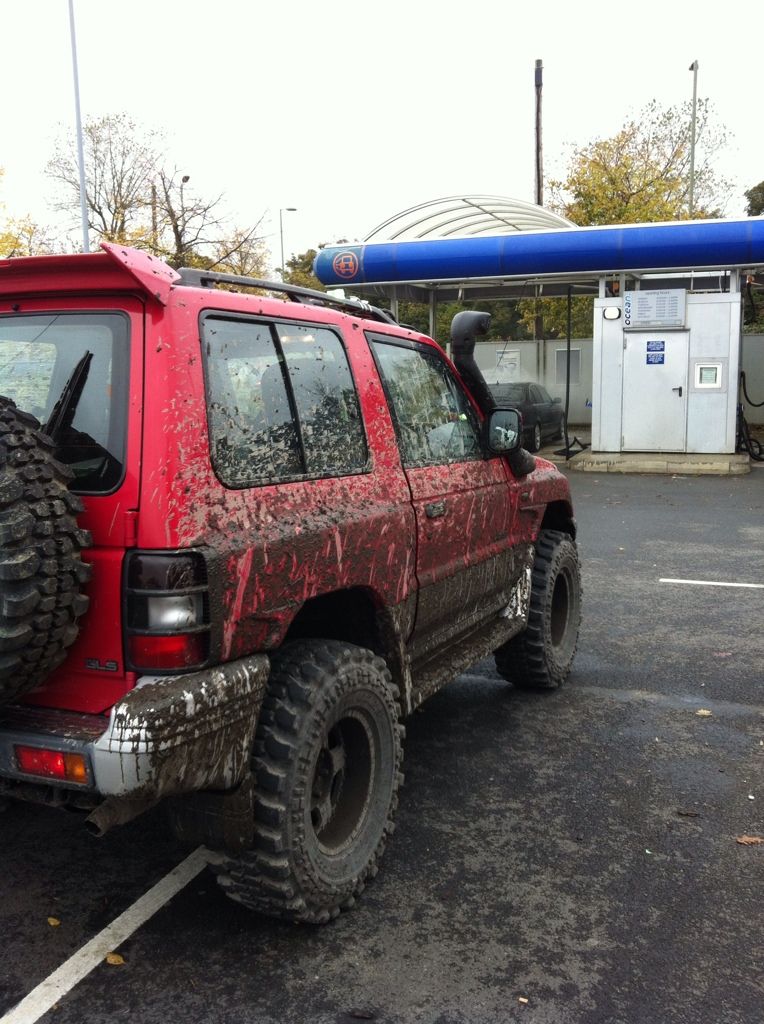
It's been some time since I last posted about this. Got plenty of progress, I haven't been out off road in the Shogun for ages. I made a trip out to some local lanes and after this trip I decided that I was not to go out green laning until I'd fitted a lift kit.
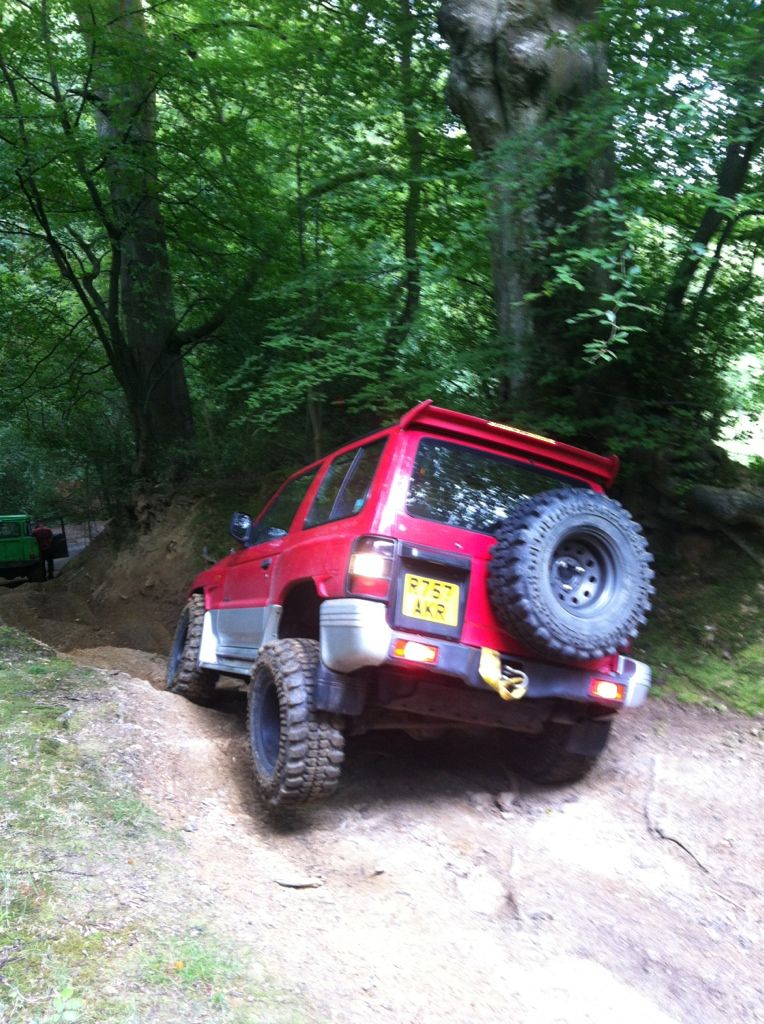
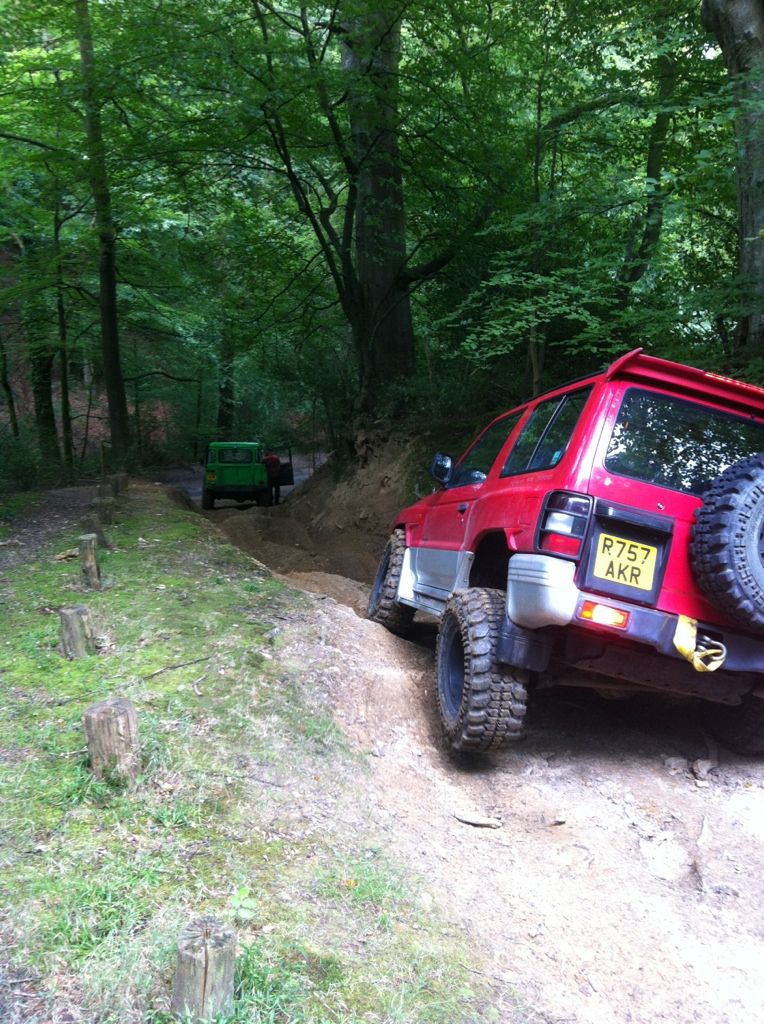
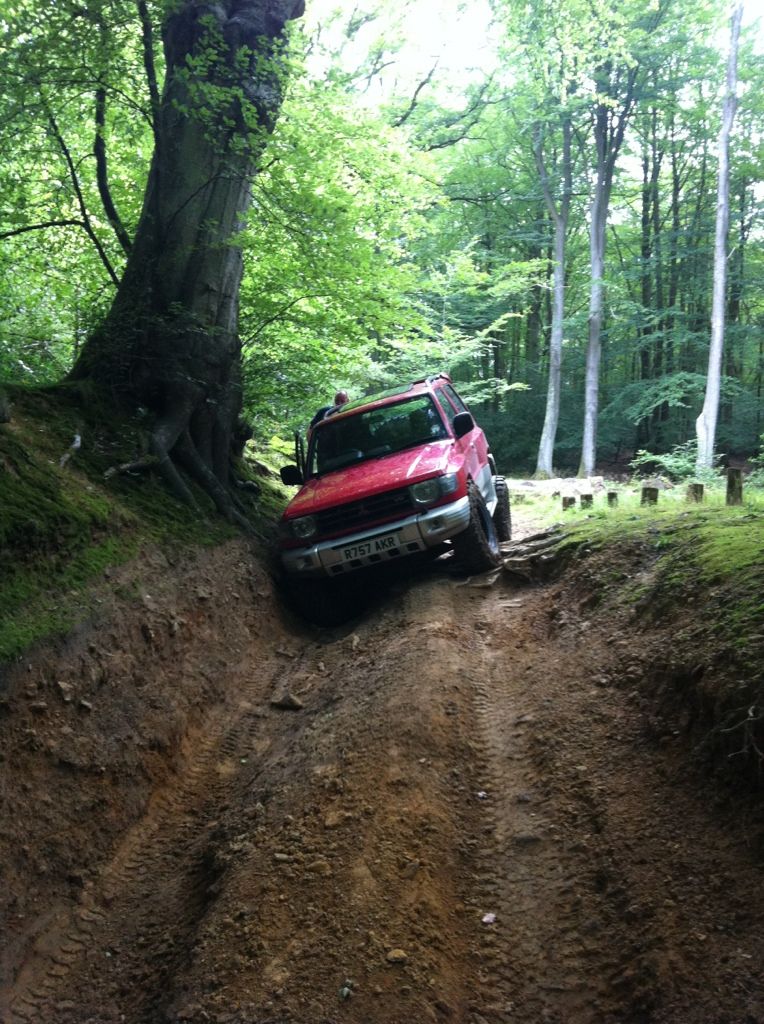
Seeing this I decided that a 1" lift probably wasn't going to cut it.
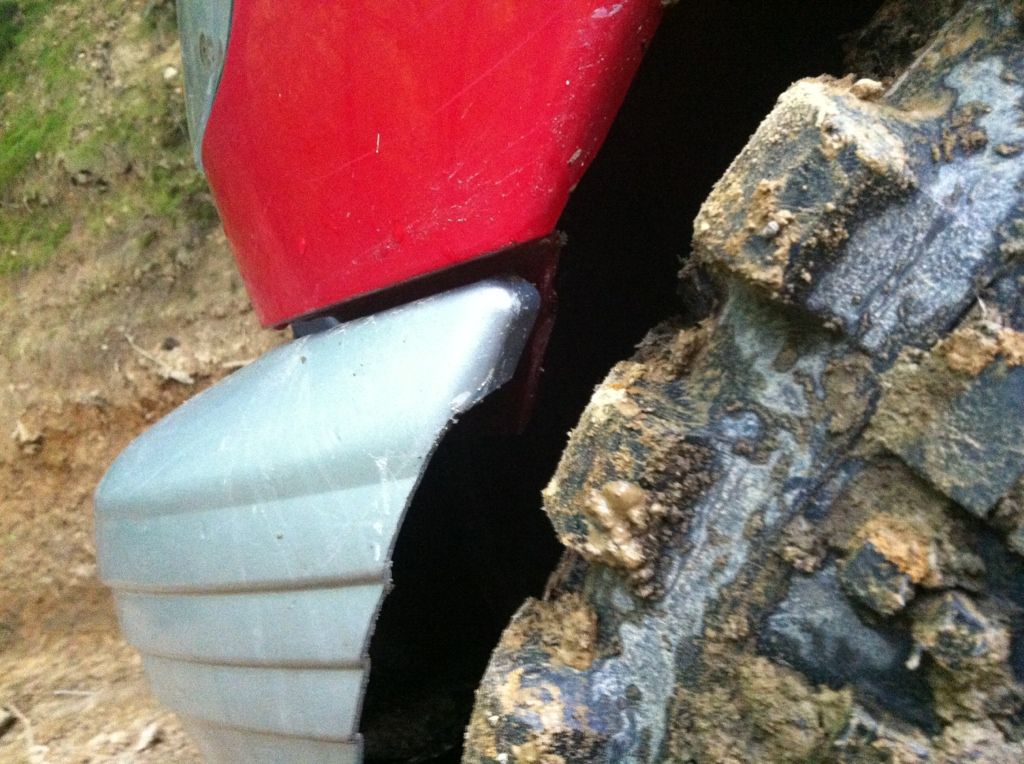
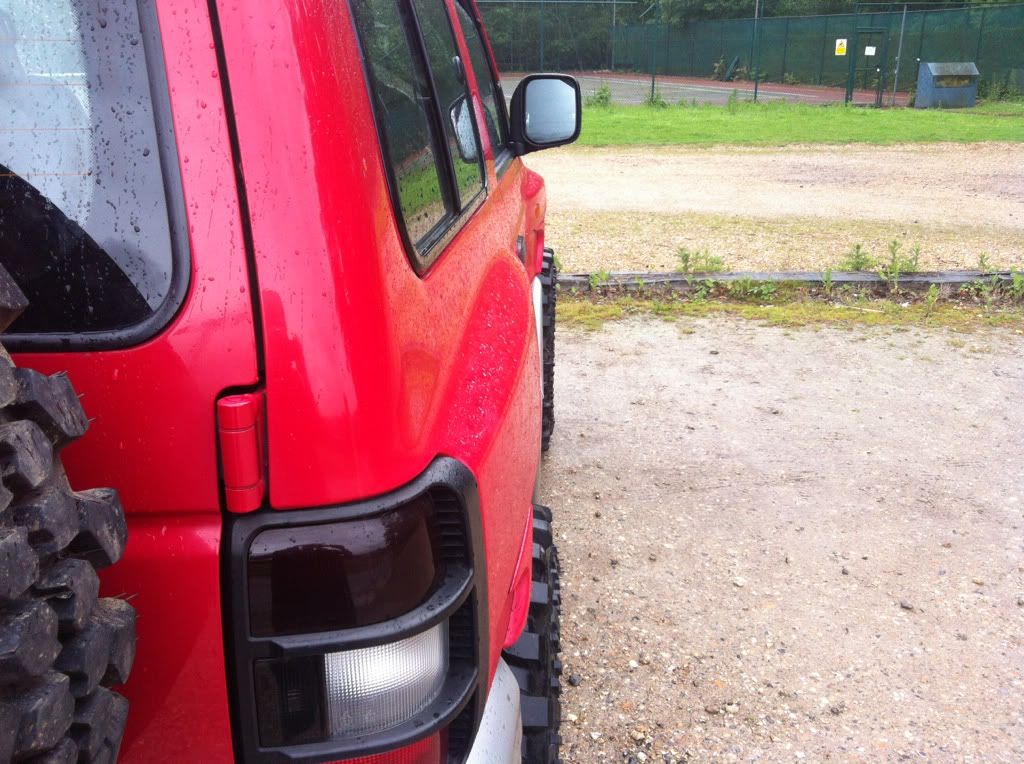
The rear trim for the side step almost got pulled off, this was after getting out and getting it back into the right position
What with the weather starting to get pretty crap over here I made the decision to get things moving and to start on the body lift. I didn't want to end up as I have previously such as repairing damaged heads out in the snow!!
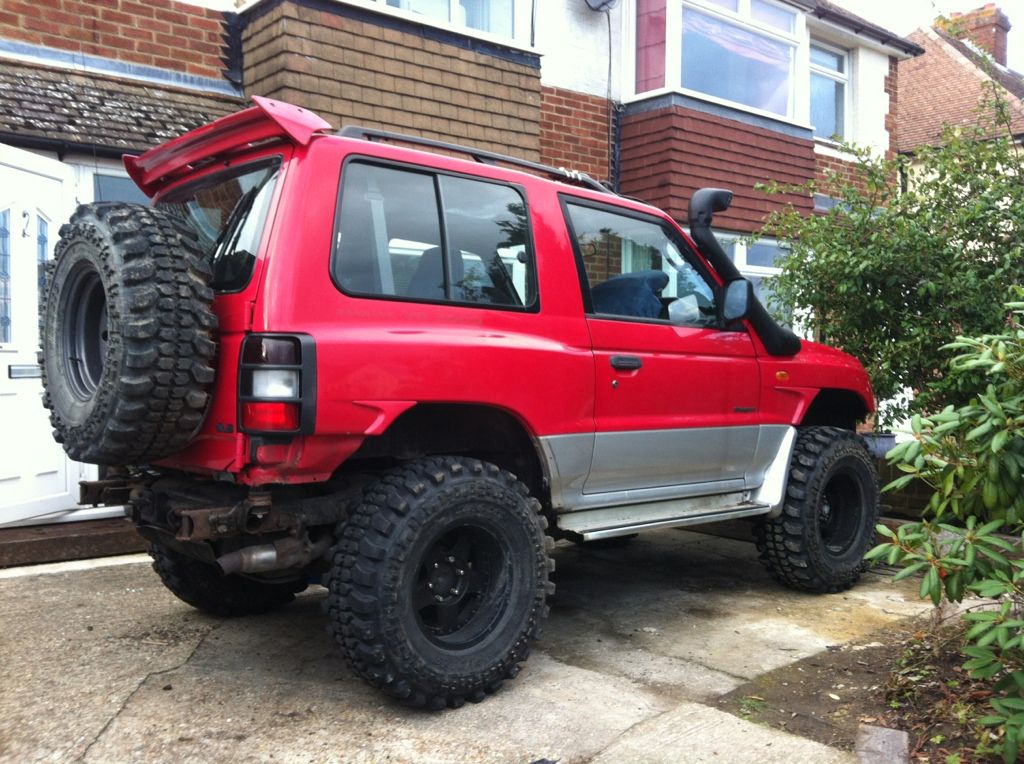
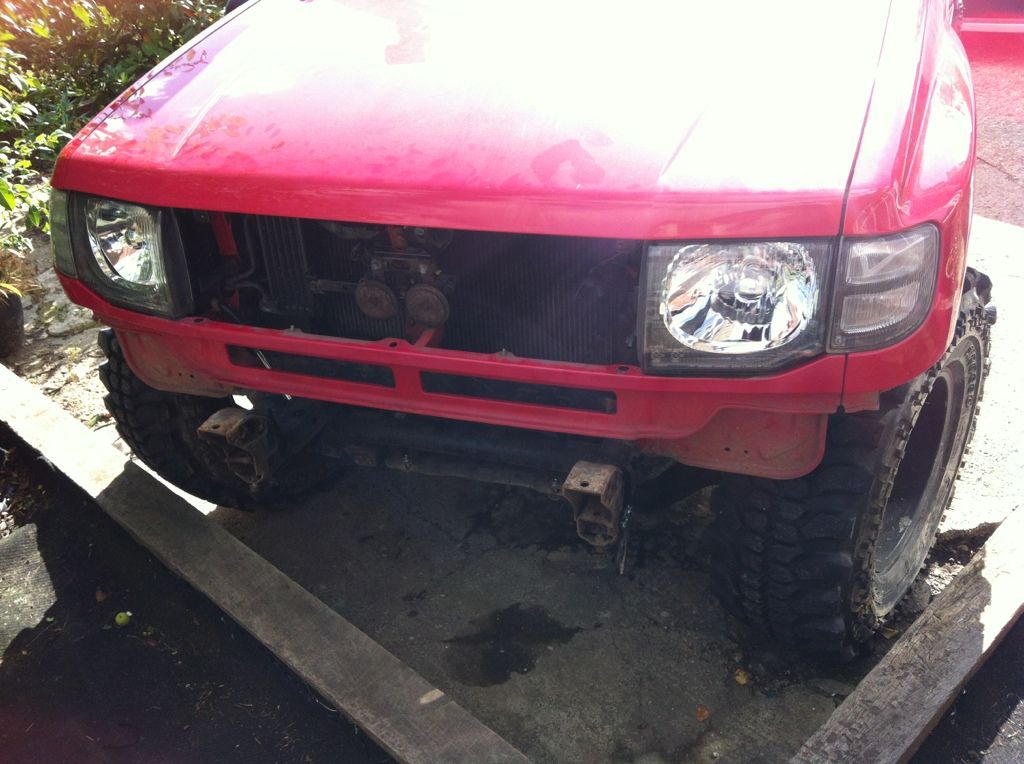
This body lift has to be one of the simplest things I've ever done to a Pajero. Only took me an hour and a half to remove both bumpers and get the spacers in. My neighbour is sorting the brackets for the rear bumper for me and I've got a long road ahead for the front bumper
I'm intending on improving on my efforts on a stealthy winch install.
The mk1
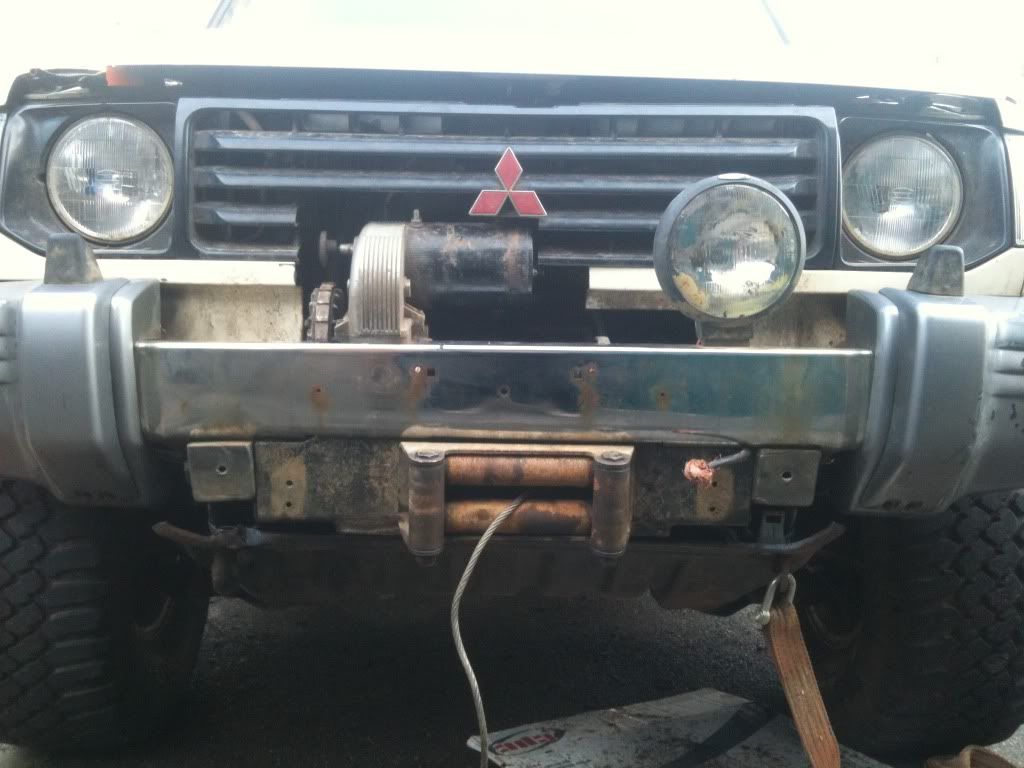
Just gotta get the right metal for the winch install however I'd say lifting the bumpers without fitting the rich would be easy with some simple plate brackets made up.
Found a good guide for fitting the body lift and also lifting the bumpers AND for sorting the rear hitch point instead of cutting the rear bumper.Comment
-
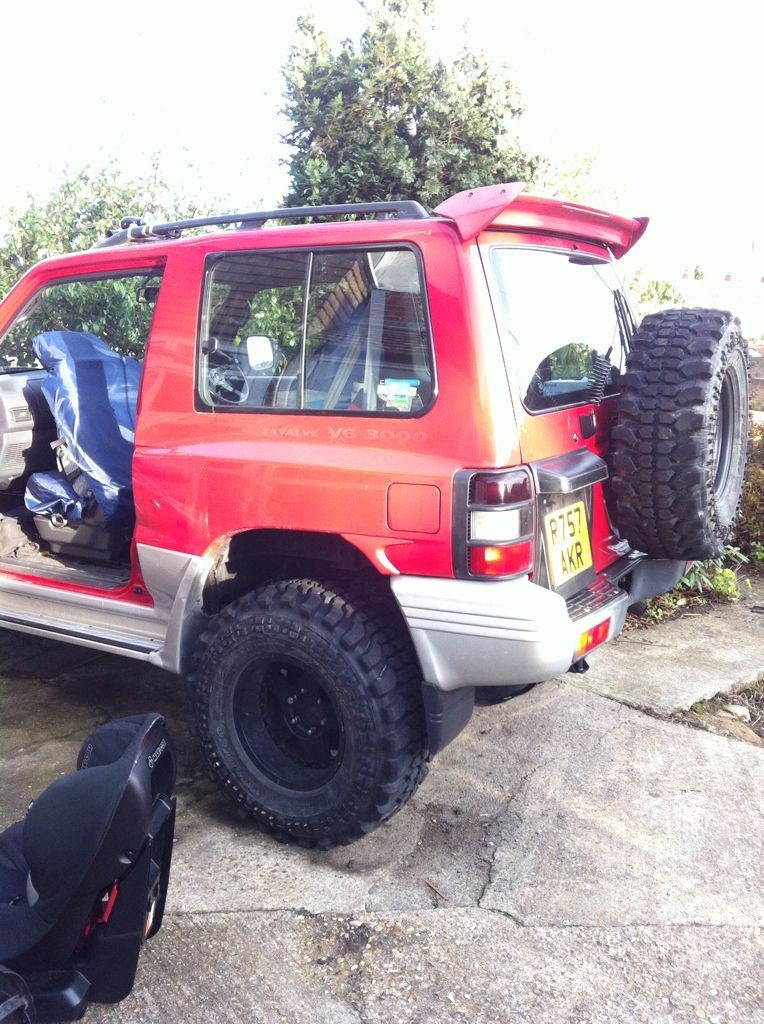
Well..... I can conclude if you want big @*$#@*$#@*$#@*$# off serious mud terrain tyres with the big side wall lugs on a swb nl then your goin to need a 2"body lift unless you want it to rub like a mofo.
Oh and I finished the winch install and the bastard task of relocating the bumpers and recovery hitch.
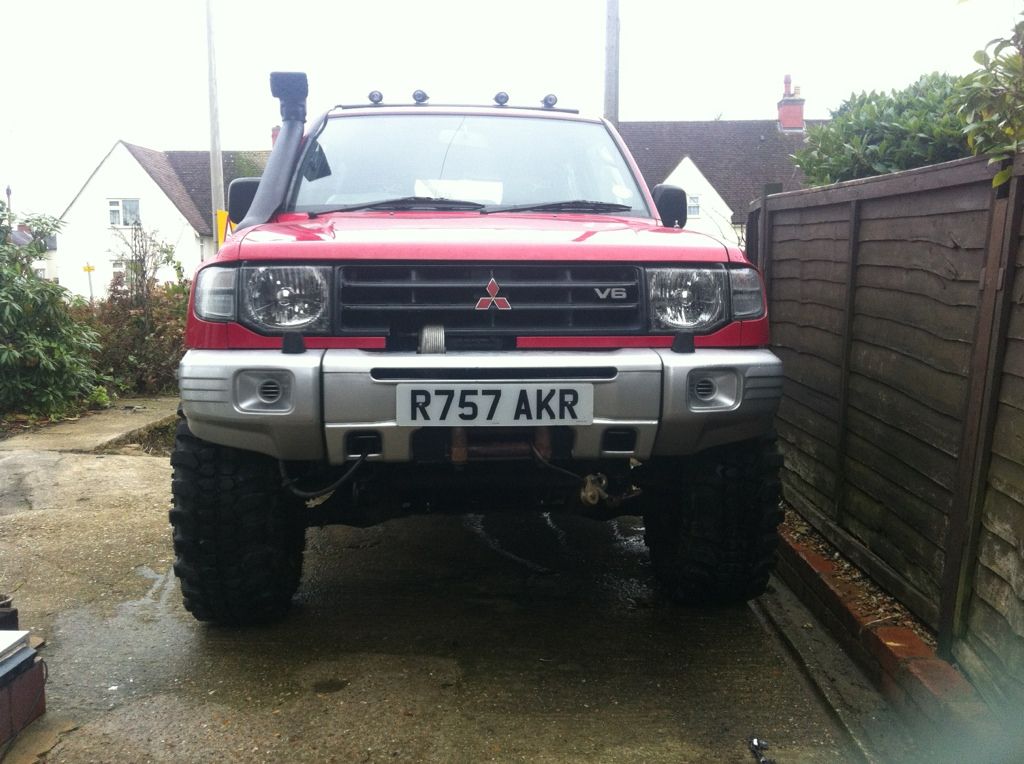
Now I'm struggling to think of more mods I'm gonna do next, bucket seats rear winch, then I'm really struggling or ideas
Comment
-
I know you just went through all the head ache of lifting your bumpers up to match the body lift BUT:
front & rear custom steel bars & rock sliders '95 NJ 3.5L auto - bocar alloy bullbar, spotties, Rampt Customs rock sliders, custom rear storage unit - soon to have 5" lift, rear bar by Rampt Customs, 16" rims with 33's, F&R diff locks, LED light bars & full caged roof rack, awning & HD towbar.
'92 NJ GLS rally comp truck.
'98 GU: 6" lift, regeared, 35" muddies, bar work & battle scars.Comment
-
Looks awesome!
How you prep the wheels is all important, hi-pressure cleaning with hot-water, then using an etch-primer should prevent that crinkling of the final coat (most likely you'll find crinkly-paint comes off with the mud when cleaned).
Steve") Steve
Steve")
 Runner-Paj; '95 NJ SWB 2.5L TD GL J-Top, low kms Project-Paj; '92 NH SWB 3.0L V6 GLS Hardtop Triple-pack, also low kms. Donor Paj; '92 NH SWB 3.0L V6 GLS Hardtop Triple-pack, with some parts & goodies to go onto other GLS.
 "I try to take life one day at a time, but sometimes several days attack me all at once!"
 Comment
-
yep high pressure clean with hot water, then a good sand back either by hand with wet/dry paper or a fine flap disc on an angle grinder then the fiddly bit done with a dremel & finished by handOriginally posted by Stevie-Ray View Post
then etch primer(1st coat, then light sand by hand, then 2nd coat followed by another light sand by hand)
then 3 coasts of paint using same procedure as primer(1st coat, sand, 2nd coat, sand, 3rd coat)
and finished off with a clear coat
that way you'll get a nice smooth & vibrant colour'95 NJ 3.5L auto - bocar alloy bullbar, spotties, Rampt Customs rock sliders, custom rear storage unit - soon to have 5" lift, rear bar by Rampt Customs, 16" rims with 33's, F&R diff locks, LED light bars & full caged roof rack, awning & HD towbar.
'92 NJ GLS rally comp truck.
'98 GU: 6" lift, regeared, 35" muddies, bar work & battle scars.Comment
-
Those bumpers are never coming off!! Plus I like the stealth effect with the winch. I've seen plenty of tubular bumpers on Mitsubishi, some good and many bad ones. For me I don't think they work and that's on most cars other then on a landrover defender which we are inundated with over here.
New rock sliders though, I'm down with them. My thoughts on those are would be to keep the plastic trims and replace the aluminium side step with a beefier set up. I'll need the trims to hide the ghastly cutting I did inside the wheel arch to retain the turning circle.
I did prep the wheels as you've both suggested however I figured that due to the circumstances they were going to be workin under there was no point in having the wheels finished to a A1 finish. They're going to get scratched and bashed so I thought it best to leave them with an aerosol finish which I can just touch up as and when I need too.
I'm still not sure why they crinkled up where they did. Thinking about it thigh it's the only area I didn't sand down as I didn't want to disassemble and split the wheels apart. By I'm not bothered now as to look at them you must really get down and look for it. And if it does flake off ill just blast it with more aerosol
Comment


Comment