 Tweet
Tweet
The mighty pajero was due for it's 180,000km service, as I'm always looking to save where I can I decided to tackle this myself... How hard could it be???
This service requires
Oil, Air and Fuel filters replaced
Engine, Diff, Gearbox & Transfer case oils replaced
Fuel Injector lines replaced
Coolant replaced
Brake fluid replaced
In addition I decided to replace the Timing Chain Guide and Tensioner plus install the SPV EGR mod. I should have replaced the SCV whilst I was at it but was not sure of the exact model. That will be a job for another weekend...
In order to save some cash I shopped around and bought some genuine parts from Japan through http://www.amayama.com Parts were delivered within 2 weeks, delay was due to the tensioner being updated. First parts get shipped to their warehouse in Peakhurst NSW and then shipped out from there. You will see the considerable savings below!
Parts bought at MMA
Timing Chain Guide - 1140A026 $22.51
Coolant - MR936572 $46.59 x2
Parts bought from Amayama
Fuel Injection Tube 1 - 1428A113 $38.16 (MMA Quoted $102.82)
Fuel Injection Tube 2 - 1428A114 $38.16 (MMA Quoted $102.82)
Fuel Injection Tube 3 - 1428A115 $38.16 (MMA Quoted $102.82)
Fuel Injection Tube 4 - 1428A116 $38.16 (MMA Quoted $102.82)
Timing Chain Tensioner - 1141A045 $48.77 (MMA Quoted $86.13) *new tensioner
Timing Chain Tensioner Gasket - ME193622 $0.97 (MMA Quoted $2.00)
Postage $33.57
There are plenty of guides on here on how to take the manifold off, there were a few differences though due to the different models. The easiest solution for me was to follow the online manual at http://faq.out-club.ru/download/paje...3/index_M1.htm
Most of my sockets are 3/8" or 1/2", sadly when taking off the top section of the manifold where the throttle body etc is my sockets would not fit due to the firewall. I was lucky enough to have a bloody small 1/4" socket set which got me out of the poo. I also needed this set when trying to access the bolts at the rear of the manifold.
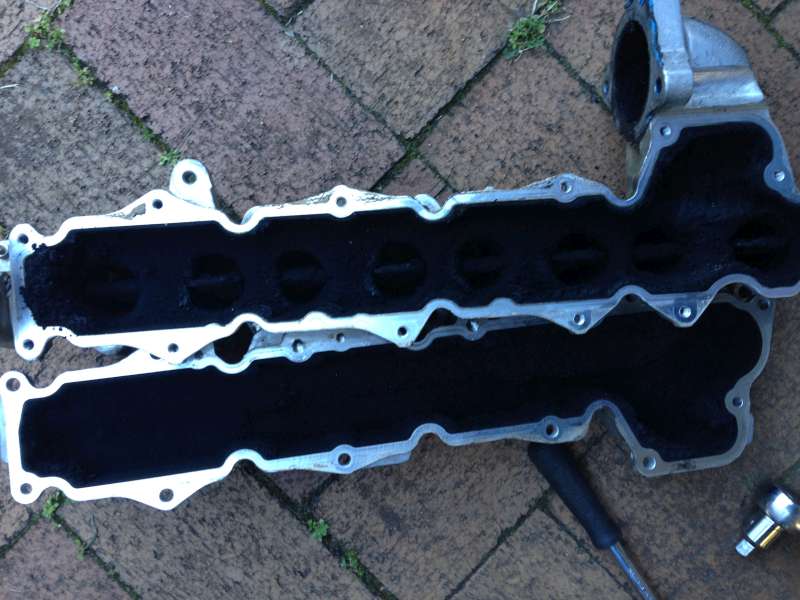
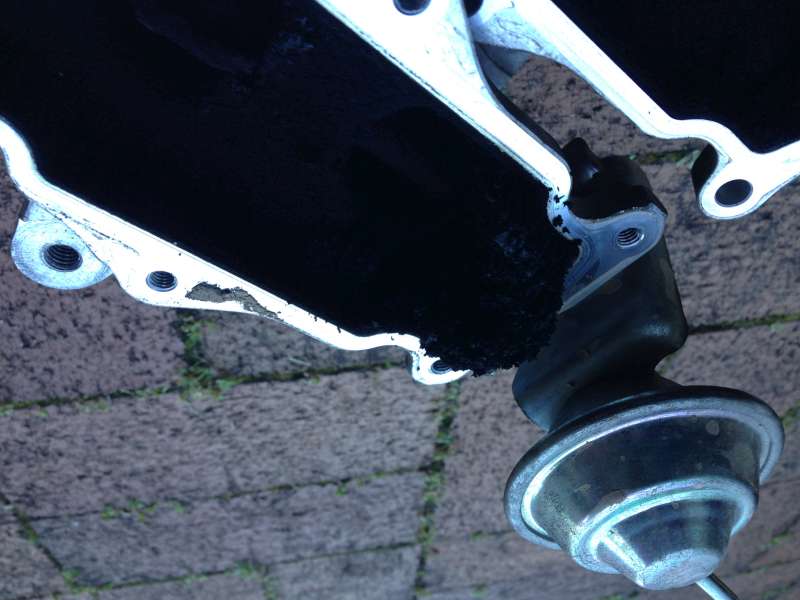
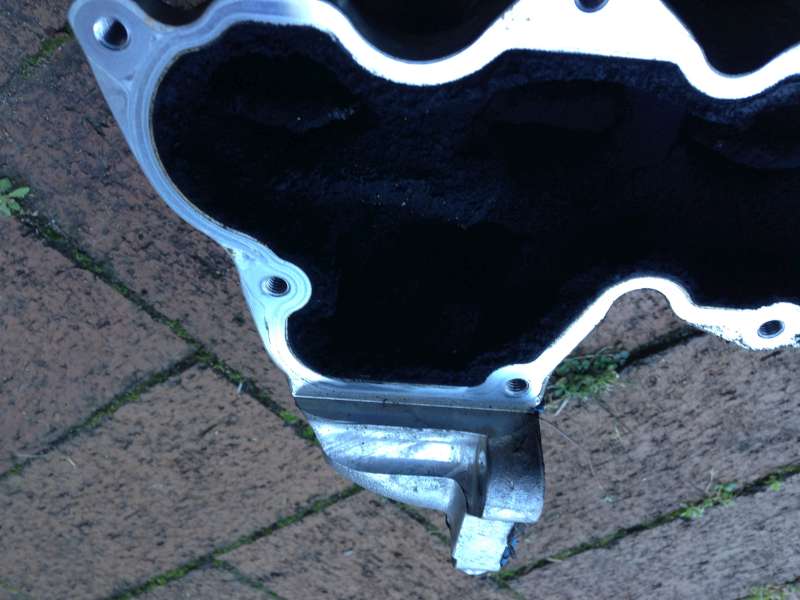
Once the manifold was off I got to see how much crap was in there. This had been "cleaned" at the 90k service.
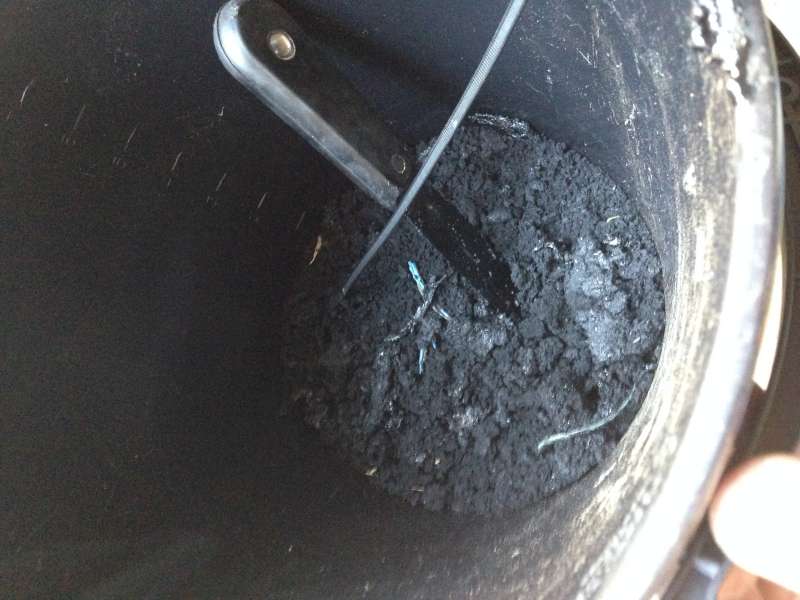
After a combination of using a small scraper and wire brush you end up with this in the bucket
Follow that up with some degreaser, pressure washer, wire brush with turps and you end up with this
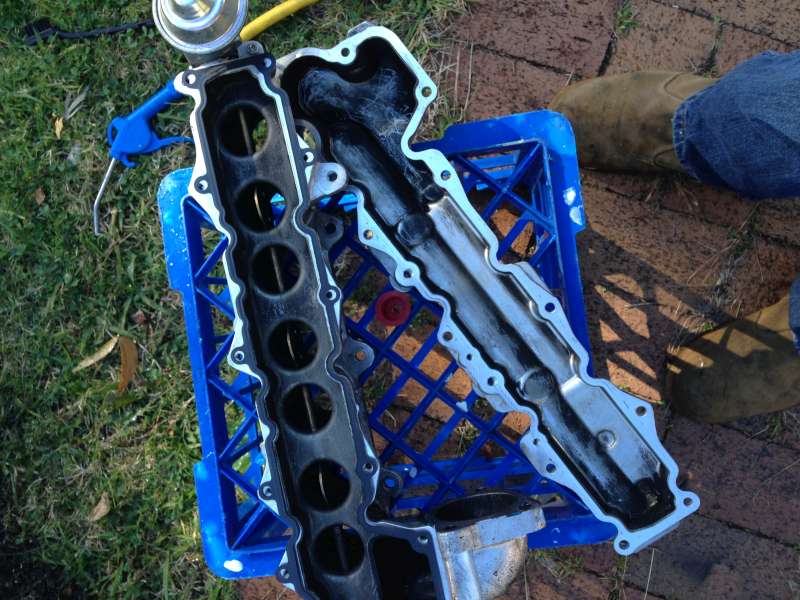
Not a bad outcome, good enough for it to go back on the block, bit of loctite aviation gasket sealer and we're good to go.
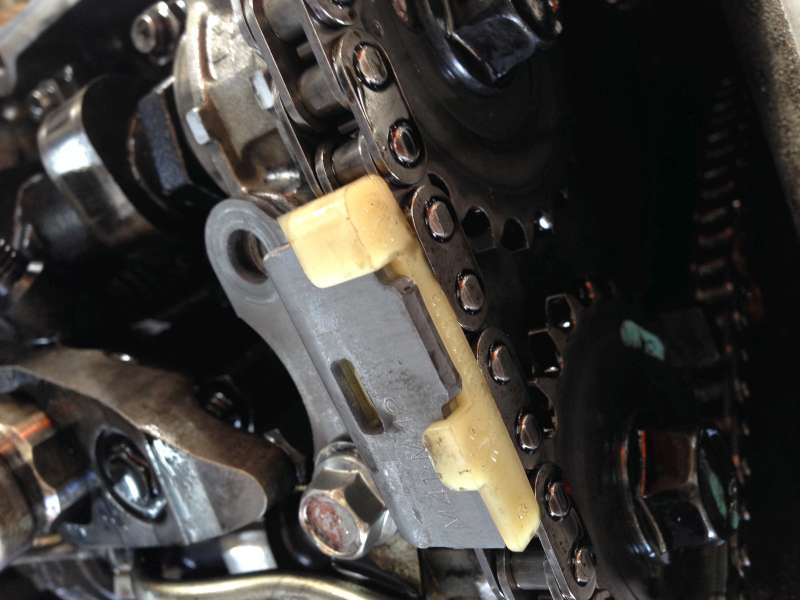
With that done it was time to change the timing chain guide and tensioner. Pop the rocker cover off and we see a lovely engine with a timing chain guide that doesn't look worn, but we're here now. Easy enough to replace right, 2 bolts she's off, put the new one on, set the torque wrench to 24NM and away we go... SNAP there goes the bolt! Didn't even get to 24NM before it snapped.
On closer inspection of the unbroken bolt it just doesn't look right...
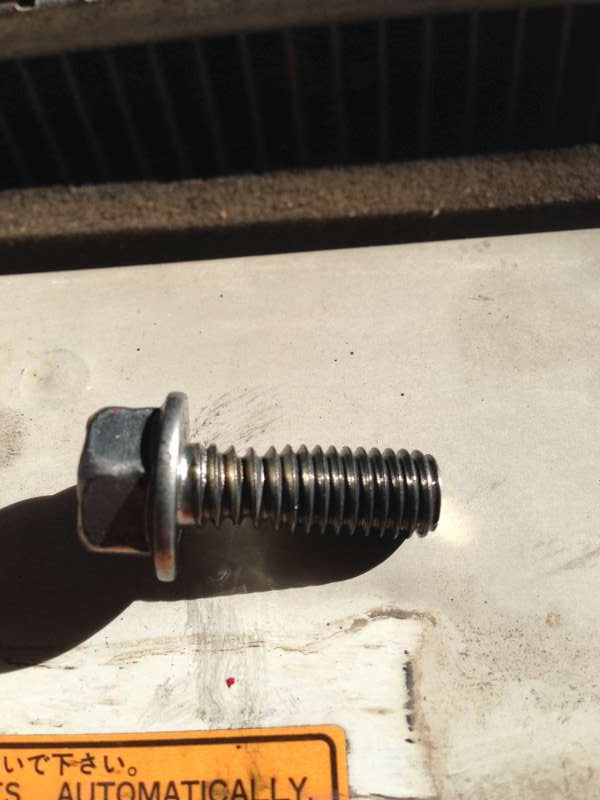
Could this be a factor in chains letting go???
After a few minutes of swearing I loosen the fuel rail, and eventually take off the cam cap. Drill a hole in the bolt, use an ezy-out and I manage to get the broken bolt out. Thread is a little tight in spots but using the other bolt I manage to clean it up. Re-install the cam cap and being a Sunday I'm up the creek. Call MMA first thing Monday and get the bolts Monday arvo. Put a little loctite on these bolts and they're in, no dramas at all.
Now onto the tensioner, take the old one out, set the new one as per the manual and install it... easy as pie. The old one did have some wear on the end of the shaft
Adjusting the valves was easy enough, worst part was getting to TDC... After taking the fan and shroud off I used a 15/16" socket on the crankshaft bolt and went to work. Turns out my motor had just gone past TDC so I got to spend alot of time turning the motor over, FUN! In hindsight I should have just removed the glow plugs and made it easy on myself...
Once tappets were adjusted everything flew back on. The fuel lines were easy to replace, I bought specific sockets from this mob for the job http://sostools.com.au/t-and-e-tools...ocket-set.html $66 delivered made sure I had them at 35NM
With everything back together again I went to fire her up. Took around 10 seconds of cranking and she was running again. No leaks and everything looked/sounded normal. Quick trip around the block and it was time for the rest of the service plus install the SPV mod.
As expected the rest of it went well, thankfully no hiccups and Tony's mod was so easy to install!
Hopefully a few of you guys get some use out of the info here...
This service requires
Oil, Air and Fuel filters replaced
Engine, Diff, Gearbox & Transfer case oils replaced
Fuel Injector lines replaced
Coolant replaced
Brake fluid replaced
In addition I decided to replace the Timing Chain Guide and Tensioner plus install the SPV EGR mod. I should have replaced the SCV whilst I was at it but was not sure of the exact model. That will be a job for another weekend...
In order to save some cash I shopped around and bought some genuine parts from Japan through http://www.amayama.com Parts were delivered within 2 weeks, delay was due to the tensioner being updated. First parts get shipped to their warehouse in Peakhurst NSW and then shipped out from there. You will see the considerable savings below!
Parts bought at MMA
Timing Chain Guide - 1140A026 $22.51
Coolant - MR936572 $46.59 x2
Parts bought from Amayama
Fuel Injection Tube 1 - 1428A113 $38.16 (MMA Quoted $102.82)
Fuel Injection Tube 2 - 1428A114 $38.16 (MMA Quoted $102.82)
Fuel Injection Tube 3 - 1428A115 $38.16 (MMA Quoted $102.82)
Fuel Injection Tube 4 - 1428A116 $38.16 (MMA Quoted $102.82)
Timing Chain Tensioner - 1141A045 $48.77 (MMA Quoted $86.13) *new tensioner
Timing Chain Tensioner Gasket - ME193622 $0.97 (MMA Quoted $2.00)
Postage $33.57
There are plenty of guides on here on how to take the manifold off, there were a few differences though due to the different models. The easiest solution for me was to follow the online manual at http://faq.out-club.ru/download/paje...3/index_M1.htm
Most of my sockets are 3/8" or 1/2", sadly when taking off the top section of the manifold where the throttle body etc is my sockets would not fit due to the firewall. I was lucky enough to have a bloody small 1/4" socket set which got me out of the poo. I also needed this set when trying to access the bolts at the rear of the manifold.
Once the manifold was off I got to see how much crap was in there. This had been "cleaned" at the 90k service.
After a combination of using a small scraper and wire brush you end up with this in the bucket
Follow that up with some degreaser, pressure washer, wire brush with turps and you end up with this
Not a bad outcome, good enough for it to go back on the block, bit of loctite aviation gasket sealer and we're good to go.
With that done it was time to change the timing chain guide and tensioner. Pop the rocker cover off and we see a lovely engine with a timing chain guide that doesn't look worn, but we're here now. Easy enough to replace right, 2 bolts she's off, put the new one on, set the torque wrench to 24NM and away we go... SNAP there goes the bolt! Didn't even get to 24NM before it snapped.
On closer inspection of the unbroken bolt it just doesn't look right...
Could this be a factor in chains letting go???
After a few minutes of swearing I loosen the fuel rail, and eventually take off the cam cap. Drill a hole in the bolt, use an ezy-out and I manage to get the broken bolt out. Thread is a little tight in spots but using the other bolt I manage to clean it up. Re-install the cam cap and being a Sunday I'm up the creek. Call MMA first thing Monday and get the bolts Monday arvo. Put a little loctite on these bolts and they're in, no dramas at all.
Now onto the tensioner, take the old one out, set the new one as per the manual and install it... easy as pie. The old one did have some wear on the end of the shaft
Adjusting the valves was easy enough, worst part was getting to TDC... After taking the fan and shroud off I used a 15/16" socket on the crankshaft bolt and went to work. Turns out my motor had just gone past TDC so I got to spend alot of time turning the motor over, FUN! In hindsight I should have just removed the glow plugs and made it easy on myself...
Once tappets were adjusted everything flew back on. The fuel lines were easy to replace, I bought specific sockets from this mob for the job http://sostools.com.au/t-and-e-tools...ocket-set.html $66 delivered made sure I had them at 35NM
With everything back together again I went to fire her up. Took around 10 seconds of cranking and she was running again. No leaks and everything looked/sounded normal. Quick trip around the block and it was time for the rest of the service plus install the SPV mod.
As expected the rest of it went well, thankfully no hiccups and Tony's mod was so easy to install!
Hopefully a few of you guys get some use out of the info here...


Comment