
 Tweet
Tweet
Hi All
Just wanted to share with you what I got up to on the weekend with a DIY restro on my faded headlights.. After years on the road your polycarbonate plastic lights dont look as clear as they could from dirt and sun damage.
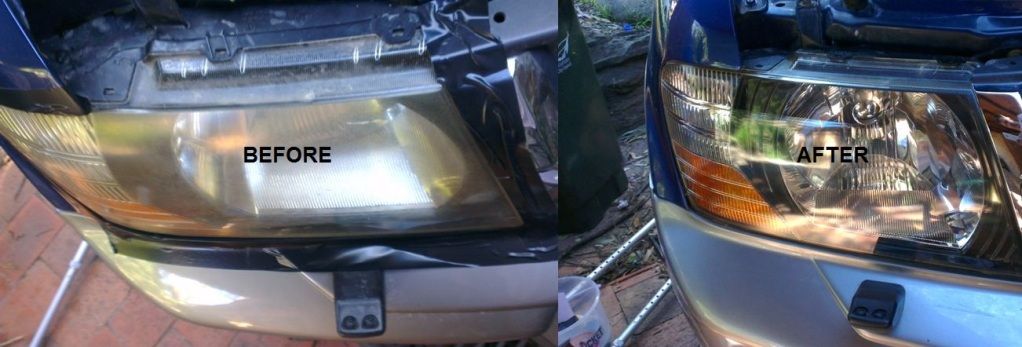
Here we have the before and after shots of my Pajero head lights. As you can see the lights were rather sun faded.
Step 1: Mask off around the headlight with some tape to protect the paint.
Step 2: A quick clean with soap and water I gave them a rub with 1500 wet and dry to get out the hard scratches and stone hits. As you are sanding you MUST use lots of water to keep the paper clean. Sand in any direction you want using the flat of your hand or use a sanding block.
Step 3: 2000 wet and dry was used to sooth out the finer scratches. At this stage the light looked worse than when I started.
Step 4: Using a cutting compound and a electric buffer start buffing the light. As you buff keep a spray bottle at hand to keep the polish wet. With even pressure polish the light to its original condition.
Step 5: Final step is to seal the light with a good carnauba wax by hand...........
This was the result..... Easy and looks a bit better then before. Don't know if this has been posted before of if anyone has a better way of doing it, but this worked for me.
Forgot to mention tat it only cost me $1 per sheet of wet n dry and $20 in polish that I needed anyway. So if you have the polish, $2 bucks and 45 minutes = great looking lights.
Thanks
Jas
Just wanted to share with you what I got up to on the weekend with a DIY restro on my faded headlights.. After years on the road your polycarbonate plastic lights dont look as clear as they could from dirt and sun damage.
Here we have the before and after shots of my Pajero head lights. As you can see the lights were rather sun faded.
Step 1: Mask off around the headlight with some tape to protect the paint.
Step 2: A quick clean with soap and water I gave them a rub with 1500 wet and dry to get out the hard scratches and stone hits. As you are sanding you MUST use lots of water to keep the paper clean. Sand in any direction you want using the flat of your hand or use a sanding block.
Step 3: 2000 wet and dry was used to sooth out the finer scratches. At this stage the light looked worse than when I started.
Step 4: Using a cutting compound and a electric buffer start buffing the light. As you buff keep a spray bottle at hand to keep the polish wet. With even pressure polish the light to its original condition.
Step 5: Final step is to seal the light with a good carnauba wax by hand...........
This was the result..... Easy and looks a bit better then before. Don't know if this has been posted before of if anyone has a better way of doing it, but this worked for me.
Forgot to mention tat it only cost me $1 per sheet of wet n dry and $20 in polish that I needed anyway. So if you have the polish, $2 bucks and 45 minutes = great looking lights.
Thanks
Jas


 Just be prepared for the lights to fade again unless you put a good UV sealant on the lights, a wax most probably won't be good enough. Some headlight restoration kits come with a sealant but I did a mates car with some Klasse Nano Sealant last week and that should last for 6 months I hope.

 01 NM 3.5 Exceed

Comment