
 Tweet
Tweet
Firstly my 3/11/1988 Pajero is a SWB 2.5 Diesel IMPORT.
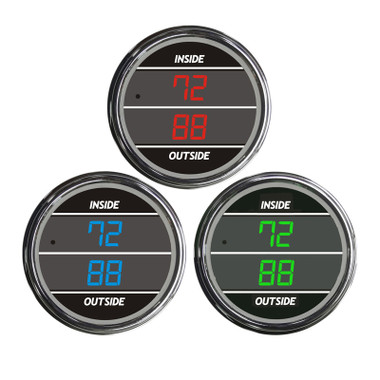
If you have one or none readings of temperature displayed I have collated a guide to help. Below is a link for an alternative TELTEK gauge for USD 123.50 plus postage.
should you give up, or the circuit board is beyond repair. From searches I usually found the top centre three gauges referred to as a 1) Pod unit OR 2) Combination gauges, my Outside Inside Thermometer gauge is on the LHS as can the seen below.

My Pajero is an 11/1988 (NF) Import 2.5 TD 4D56 Auto. So now to the repair...
You need to remove the Outside Inside Thermometer Gauge (OITG) from the Pod.
There are two phillips head screws, the RHS will require an offset screwdriver, due to limited space. Once the shroud is removed I had three more phillips head screws to remove and then a wiring harness to disconnect. Two wires go the the light for the pod which should come on when you turn on your headlights. Replace the wedge shaped globe if it is burnt out. Now to the OITG. Remove all facia screws from the three gauges and then at the back two small phillips head no. 1 screws to get the OITG out. I had to cut all its wires to get them out the small hole at the back. I later rejoined them all back together using a terminal block I purchased from an Electronics Store, here in Australia called Jaycar for about $3 AUD. Below you can see all the wires temporarily joined back together with electrical tape, prior to final assembly.

As you can see the OITG is now fully working. Here are the steps I followed.
First look under the centre of the steering wheel cover and you will see what has been described in another post as a christmas tree light, see picture below.

The Thermistor looks like a black "Christmas Tree Bulb" as in the photo above. I have since wrapped it in Aluminium Foil to make it react more quickly to temperature changes. See further below for an explanation.
To test the thermistor which is the correct name for the christmas tree bulb, remove the seven phillips head screws which hold the underneath cover for the steering wheel. Then disconnect the thermistor from its harness which is right on the edge of the lower dash. Now plug in a Multimeter set to resistance and it should read 1000 ohms at 24 degrees celsius. As you heat the thermistor with a hair dryer (which you borrowed from your wife) the resistance should go down. There is no positive/negative to worry about as it is essentially just a resistor, which changes its resistance due to heat. Now test the thermistor mounted under the bumper bar on the LHS, (passenger side in Australia). Here is a picture of where it is located, lie down under the LHS at the front and look under the bumper bar. In this picture you can also see the overflow pipe and the Air Con Receiver/Dryer.

The next picture shows the outside thermistor which has been disconnected from its wiring harness

Part 2 Follows.... see next thread (as it only allows a max. of 5 photos per thread)?
If you have one or none readings of temperature displayed I have collated a guide to help. Below is a link for an alternative TELTEK gauge for USD 123.50 plus postage.
should you give up, or the circuit board is beyond repair. From searches I usually found the top centre three gauges referred to as a 1) Pod unit OR 2) Combination gauges, my Outside Inside Thermometer gauge is on the LHS as can the seen below.
My Pajero is an 11/1988 (NF) Import 2.5 TD 4D56 Auto. So now to the repair...
You need to remove the Outside Inside Thermometer Gauge (OITG) from the Pod.
There are two phillips head screws, the RHS will require an offset screwdriver, due to limited space. Once the shroud is removed I had three more phillips head screws to remove and then a wiring harness to disconnect. Two wires go the the light for the pod which should come on when you turn on your headlights. Replace the wedge shaped globe if it is burnt out. Now to the OITG. Remove all facia screws from the three gauges and then at the back two small phillips head no. 1 screws to get the OITG out. I had to cut all its wires to get them out the small hole at the back. I later rejoined them all back together using a terminal block I purchased from an Electronics Store, here in Australia called Jaycar for about $3 AUD. Below you can see all the wires temporarily joined back together with electrical tape, prior to final assembly.
As you can see the OITG is now fully working. Here are the steps I followed.
First look under the centre of the steering wheel cover and you will see what has been described in another post as a christmas tree light, see picture below.
The Thermistor looks like a black "Christmas Tree Bulb" as in the photo above. I have since wrapped it in Aluminium Foil to make it react more quickly to temperature changes. See further below for an explanation.
To test the thermistor which is the correct name for the christmas tree bulb, remove the seven phillips head screws which hold the underneath cover for the steering wheel. Then disconnect the thermistor from its harness which is right on the edge of the lower dash. Now plug in a Multimeter set to resistance and it should read 1000 ohms at 24 degrees celsius. As you heat the thermistor with a hair dryer (which you borrowed from your wife) the resistance should go down. There is no positive/negative to worry about as it is essentially just a resistor, which changes its resistance due to heat. Now test the thermistor mounted under the bumper bar on the LHS, (passenger side in Australia). Here is a picture of where it is located, lie down under the LHS at the front and look under the bumper bar. In this picture you can also see the overflow pipe and the Air Con Receiver/Dryer.
The next picture shows the outside thermistor which has been disconnected from its wiring harness
Part 2 Follows.... see next thread (as it only allows a max. of 5 photos per thread)?


Comment