Below Nav Bar Ad Module

Collapse

Geopaj's Paj (NT VRX)

Collapse
X
 
  • Filter
  • Time
  • Show
Clear All
new posts
  • Hatto
    Valued Member
    • Nov 2013
    • 1208
    • Mandurah WA

    #31
    Enjoying your write up Geopaj. Some great mods there. As said previously some of the best ones are the cheapest and simplest mods.
    Cheers, Hatto

    2012 NW GLS Diesel Auto with:
    ARB delux bar, full length Ocam ally roof rack with rear LED work light, dual batteries, DIY rear ally drawers with fridge slide, 2" lift oztec/kings, Polyairs, Kings awning 2.5 x 2.5m with LED strip light, pair of genr8 40w LED spot/flood driving lights, iron man 4x4 22" LED light bar, mounted thumper compressor, 70L water tank & 12v pump, 120w solar, LED interior lights, Boo Boo's bash plates, Safari snorkel and Grande mk lll 12000lb winch.

    Comment

    • geopaj
      Valued Member
      • Jul 2007
      • 2756
      • Adelaide

      #32
      Originally posted by gemster View Post
      Nice work Justin...the best mods are the ones you can do yourself...and cheap..
      I made some window blinds for mine awhile ago out of air-con lagging...very similar stuff....makes a real difference that's for sure.. Love the compressor location, but don't think it will fit in the NL.... still looking for the right spot...Well done
      Originally posted by 0415discog View Post
      Enjoying your write up Geopaj. Some great mods there. As said previously some of the best ones are the cheapest and simplest mods.
      Thanks lads. It's nice to know people are finding my build/mods interesting.

      I've got a few more things I plan to photograph and hope to share over the next few days before this thread is 'up to date'... Stay tuned
      Last edited by geopaj; 28-08-15, 12:38 AM.
      Silver NT VRX Di-D

      ARB bullbar | snorkel | Bushskinz & Boo’s guards | UltraGauge MX | 2" lift | Cooper AT3 LT's | dual battery | Superwinch X9 | 80ltr diesel tank | 22ltr water tank | aux trans cooler | MM Lockup Mate | GME UHF | locker/TC mod | SPV EGR | rear LED work light | rhino platform | ARB awning | rear drawers ... & plenty of scratches

      My Build Thread - HERE

      Previously - NL Pajero (now owned by Forum member 'Gemster')

      Comment

      • geopaj
        Valued Member
        • Jul 2007
        • 2756
        • Adelaide

        #33
        Quick release DIY "Rock Tamer" Mud Flaps & Rear Bumper Protection - Pt 1

        Made some quick release "Rock Tamer" mud flaps using conveyer belting and a combination of 20mm RHS and 25mm RHS.

        I made a similar set for the NL that survived thousands of kilometres of outback traveling without incident.

        The 25mm RHS is mounted to the Pajero and the conveyer belting is attached to the 20mm RHS. As they say, a picture is worth a thousand words.

        Note that the left and right conveyer belting is not completely symmetrical so as to clear the exhaust on the left hand side.

        Rear view with mud/stone flaps attached


        Side view with mud/stone flaps attached


        Mud/stone flaps removed (note: retaining clips are also in this pic - to remove the flaps, it is just a matter of removing these clips and pulling the 20mm RHS out from inside the 25mm RSH - takes all of about 10 seconds)


        I have discovered a very interesting side benefit too... The 25mm RHS mounted to the rear (with the mud/stone flaps removed) also appears to provide protection for the vulnerable rear bumper bar when in sand. I've have done several sand trips (two to Peake and a trip to Robe) and, to date have NEVER damaged the rear bumper (despite other members of our group with gen 4 Pajeros, who have damaged their rear bumper on the same tracks/obstacles!). I'm not sure of the physics, but that's been my experience!
        Last edited by geopaj; 03-05-18, 08:43 PM. Reason: Postimage links updated
        Silver NT VRX Di-D

        ARB bullbar | snorkel | Bushskinz & Boo’s guards | UltraGauge MX | 2" lift | Cooper AT3 LT's | dual battery | Superwinch X9 | 80ltr diesel tank | 22ltr water tank | aux trans cooler | MM Lockup Mate | GME UHF | locker/TC mod | SPV EGR | rear LED work light | rhino platform | ARB awning | rear drawers ... & plenty of scratches

        My Build Thread - HERE

        Previously - NL Pajero (now owned by Forum member 'Gemster')

        Comment

        • geopaj
          Valued Member
          • Jul 2007
          • 2756
          • Adelaide

          #34
          Quick release DIY "Rock Tamer" Mud Flaps & Rear Bumper Protection - Pt 2

          The 25mm RHS is attached to the 'vehicle part' of the towbar. 25mm RHS seems to be the perfect size - when placed through the (factory MM) towbar's tie down holes and under the square hitch mount it is a tight interference fit (requiring some force to actually insert). I then made a small bracket to stop the 25mm RHS moving and counteract the twisting action that the mud/stone flaps would create.

          Some close up pictures of how the 25mm RHS is installed...

          Rear view with mud/stone flaps removed


          Close up of the brackets (I used square U-bolts from Stratco to hold the RHS to the bracket and two small bolts with nyloc nuts to hold the bracket to the tie down loops)


          Close up of the 25mm RHS under the square hitch mount


          Cost: 1.3m of 25mm RHS, 1m of 20mm RHS, and some conveyer belting (I already had all but the 25mm RHS in the shed)

          My suggestion for anyone making mud/stone flaps is to not make them too long - I've seen some that actually flick stones up off the road surface, and thus are actually counter productive!
          Last edited by geopaj; 03-05-18, 08:43 PM. Reason: Postimage links updated
          Silver NT VRX Di-D

          ARB bullbar | snorkel | Bushskinz & Boo’s guards | UltraGauge MX | 2" lift | Cooper AT3 LT's | dual battery | Superwinch X9 | 80ltr diesel tank | 22ltr water tank | aux trans cooler | MM Lockup Mate | GME UHF | locker/TC mod | SPV EGR | rear LED work light | rhino platform | ARB awning | rear drawers ... & plenty of scratches

          My Build Thread - HERE

          Previously - NL Pajero (now owned by Forum member 'Gemster')

          Comment

          • gemster
            Valued Member
            • Aug 2012
            • 698
            • Gold Coast

            #35
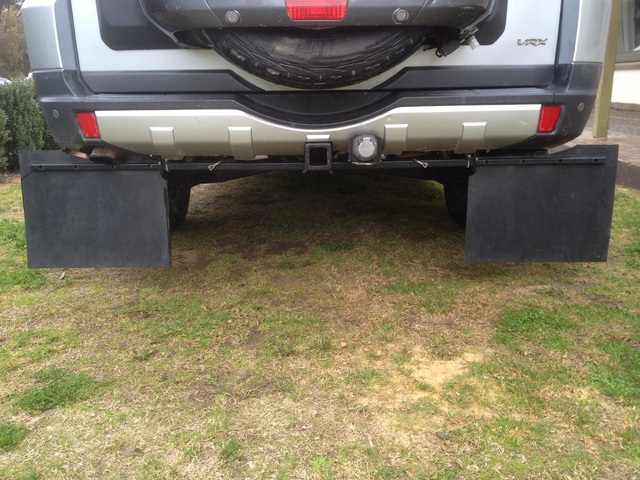
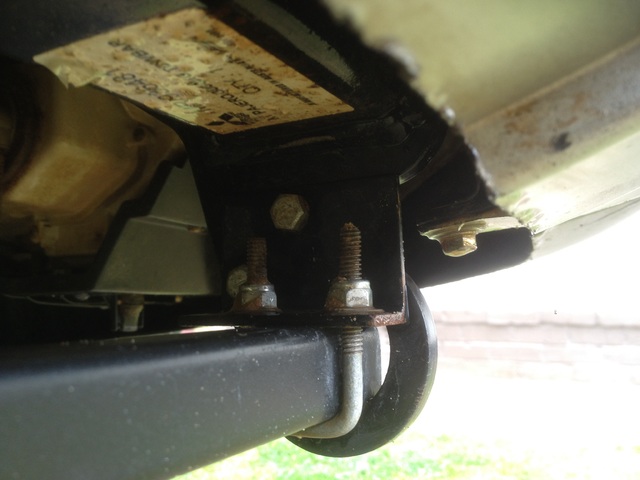
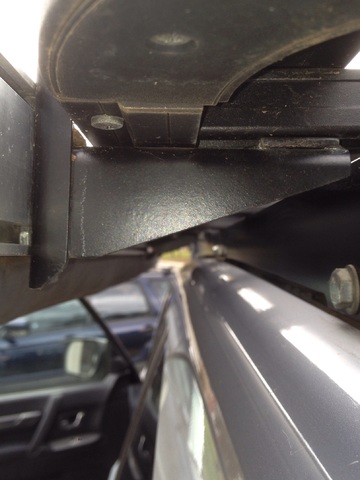
            Ah now I know what that bar is for....thought so....Excellent idea Justin.... That would fit most 4x4s out there
            YES. ITS A MITZY . 97 NL 3.5 GLS AUTO (Formally owned by geopaj)__ Snorkel ,2 Uniden Uhfs , Roof Console, 2"lift, TT Suspension, Dual bat, Redarc System, BFG KO2's All Terrains, 55L sub tank, Pioneer sound, Milford cargo barrier, Extractors, SS exhaust, Rear camp light, Free Wheel Hubs, Improved Rear Storage unit, Alarm, Led interior lamps...
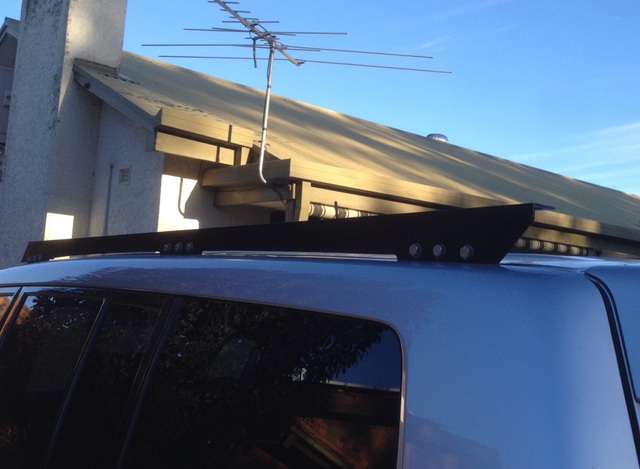
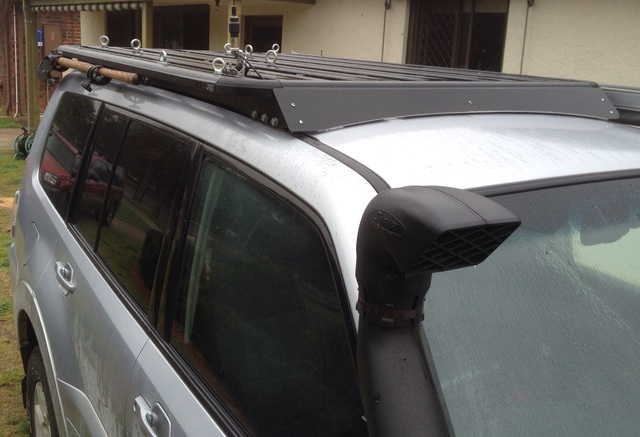
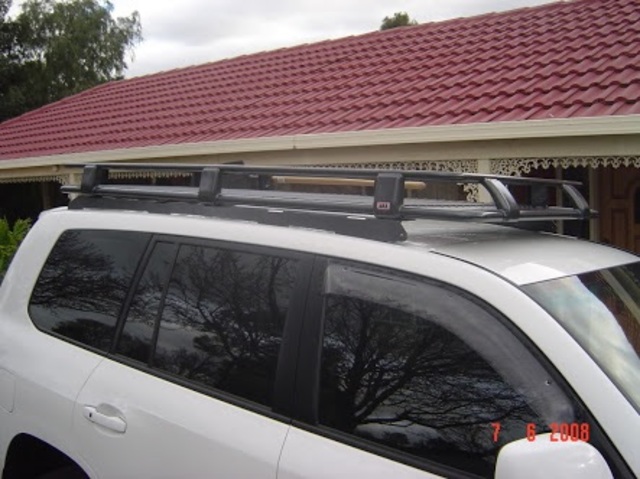
            And a 1999 NL LWB... Called 'Project Covid".. Stock Standard.
            ..Both with No Airbags. We die like real Men

            Comment

            • rotare
              Valued Member
              • Nov 2007
              • 923

              #36
              Loving your thread. Some really terrific ideas shared. Thanks
              2013 NW VRX

              Comment

              • geopaj
                Valued Member
                • Jul 2007
                • 2756
                • Adelaide

                #37
                Touring Roof Rack (Rhino Platform on custom DIY mounts)

                As the NT had a aluminium boat loader with custom reinforced mounts installed into the roof and I had a Rhino Platform & ARB awning off my NL, I decided to make a mount to attach the Rhino Platform to the boat loader's reinforced roof mounts (this had several advantages - 1. Maintaining the reinforced and plated roof mounts, and - 2. Meant I avoided having to drop the roof lining to remove the boat loader's mounts and install Rhino mounts) - 3. I could keep the rack mounted low so I can still access the majority of commercial car parks in Adelaide [usual clearance seems to be 2.05m] ).

                I started off with a 75mm X 75mm X 3mm full length of aluminium angle. I then cut two pieces to the length of the platform. The next step was to cut one side of the aluminium angle down to 45mm, and machine the other side to match the profile of the roof.


                With the above done for both sides it was just a matter of attaching the Rhino Platform to the horizontal side of the aluminium angle. As seen in the picture below, I also decided to add a wind deflector. The wind deflector also adds diagonal stability to my aluminium angle mounts (FYI I set the wind deflector angle to be the same as the windscreen). The eyelets visible in the picture are easily adjusted or removed.


                Unfortunately, when I installed the Rhino Platform and awning, I discovered that the awning was slightly too low and fouled the top of the doors by about 10-15mm. Bugger! I was keen to keep the top of the awning below the top of the platform (for clearance and protection), so machined and welded up these brackets (started with 40x40x2.5mm galv angle iron).


                Success! The finished project (I now just need to sort out a nice low bracket for the UHF antenna)


                The 'design inspiration' for the for my aluminium angle mounts came from the way ARB make their roof mounts for vehicles without roof gutters (as per this picture I found online, of a 200 Series I think). To my eyes at lest, my mounts and ARB's have a similar 'look' (except for the wind deflector, obviously).


                I am very happy with the outcome - the roofrack is completely silent and I have noticed NO difference in fuel consumption (even on extended highway speeds).

                Cost: I think it was about $70 for the 6.5mtr length of aluminium angle, and <$10 for a scrap off-cut it to make the wind deflector.
                Last edited by geopaj; 03-05-18, 08:44 PM. Reason: Postimage links updated
                Silver NT VRX Di-D

                ARB bullbar | snorkel | Bushskinz & Boo’s guards | UltraGauge MX | 2" lift | Cooper AT3 LT's | dual battery | Superwinch X9 | 80ltr diesel tank | 22ltr water tank | aux trans cooler | MM Lockup Mate | GME UHF | locker/TC mod | SPV EGR | rear LED work light | rhino platform | ARB awning | rear drawers ... & plenty of scratches

                My Build Thread - HERE

                Previously - NL Pajero (now owned by Forum member 'Gemster')

                Comment

                • RUGGA
                  Valued Member
                  • Nov 2014
                  • 1373
                  • Adelaide

                  #38
                  Me thinks I saw that rear light today, on Henley Beach Rd..... very neat Paj.
                  02 NM 3.2, Auto, Exceed, I/C and sump guards, L&B 2" lift, 265/75/16 OPAT2.

                  Comment

                  • geopaj
                    Valued Member
                    • Jul 2007
                    • 2756
                    • Adelaide

                    #39
                    Originally posted by RUGGA View Post
                    Me thinks I saw that rear light today, on Henley Beach Rd..... very neat Paj.
                    Yep, that would have been me - 
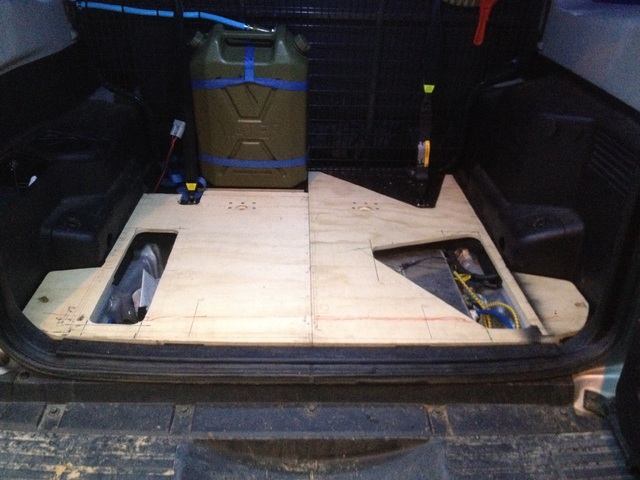
the Paj is currently much cleaner than in the last photo.
                    Silver NT VRX Di-D

                    ARB bullbar | snorkel | Bushskinz & Boo’s guards | UltraGauge MX | 2" lift | Cooper AT3 LT's | dual battery | Superwinch X9 | 80ltr diesel tank | 22ltr water tank | aux trans cooler | MM Lockup Mate | GME UHF | locker/TC mod | SPV EGR | rear LED work light | rhino platform | ARB awning | rear drawers ... & plenty of scratches

                    My Build Thread - HERE

                    Previously - NL Pajero (now owned by Forum member 'Gemster')

                    Comment

                    • seadie
                      Member
                      • Jun 2012
                      • 90
                      • darwin

                      #40
                      Looks really good geopaj I especially like the wind deflector you have made up something I might have to try to also. I have the same rack but with the rhino mounts so it will have to be of a different design obviously.
                      MY05 NP DID GLS,Custom Front&Rear Bars,Custom Side Steps,EWX Runva Winch,2"lift (Bilsteins&Lovells), Rear Polys,Chip-It Chip with EGT Gauge,Beaudesert Exhaust System, 285/75R16 BFG KM2's,Allied Rims, Custom False Floor & MSA Drop Slide, 80Lt Engel, Safari Snorkel,Rally 4000 HID's,Baja Designs 20" LED Light Bar,Bushskinz Intercooler,Sump&Tranny Plates,4.3 Ratio Diffs,Diff,Tranny&Transfer Breather Kit, Dual Battery System in seat well,ARB Compressor,Cross country TMIC,NM 4M41

                      Comment

                      • geopaj
                        Valued Member
                        • Jul 2007
                        • 2756
                        • Adelaide

                        #41
                        DIY Rear drawers - Step 1 (Preparation & Water Tank)

                        Ok, I now think I've got this thread up to date, so now onto my current build - a set of drawers including a water tank and fridge slide. In the NL I made a fridge slide and basic storage unit that was based around plastic tubs. After using this setup for a few years, I swore if I had a second chance I'd do away with the tubs and build a drawer.

                        Therefore, I am now building a drawer system. On the left will be a 1/2 height drawer under the fridge (to keep the fridge low for easy access), and on the right will be a 'normal height' drawer.

                        My 'brief' is for the drawers to include a water tank and to still enable the kids' seats to use the factory child restraints uninterrupted.

                        Before staring the drawer build, I wanted to do a couple of things first...

                        I modified the rear door 'holder-opener thing' so that the rear door would open wider so that the RH drawer can be hard up against the wheel arch but still have plenty of clearance to open. This turned out to be an easy mod - I just had to elongate the holes in the door bracket by (IIRC) about 8mm.


                        I then made longer top mounts for the cargo barrier. This makes the cargo barrier sit hard up against the rear seat back and increases the usable cargo area.


                        Next was to mount a 20L jerry can to the cargo barrier. It's important to use a good quality jerry can that is dark in colour so that algae will not grow on the inside. I also make a platform for it to sit on out of formply to support the bottom of the jerry can. The pipe at the to is a air vent that disconnects at the top of the cargo barrier to enable the tank to be pressure filled via the lower 'outlet' hose, without overflowing into the cabin. With the jerry can set up as a permanently sealed vessel, it actually holds more like 22-23L. 
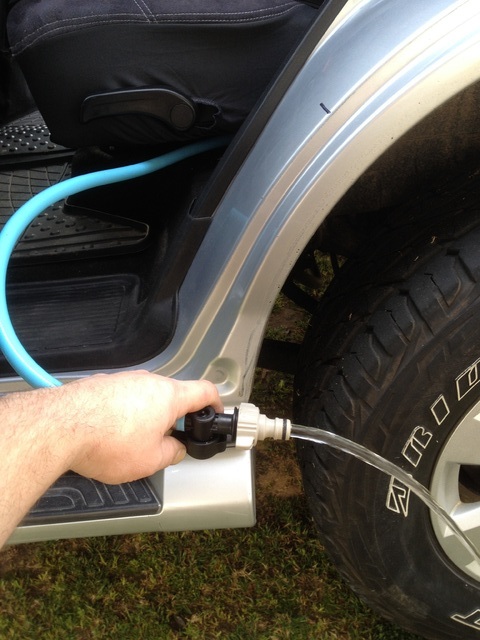
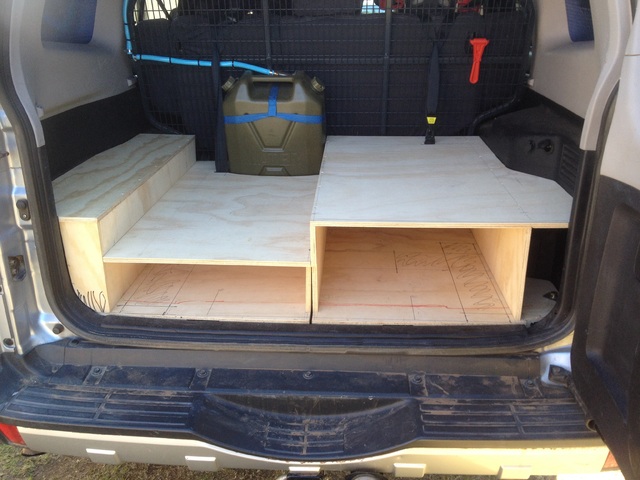
the water tank will sit in the 'wasted space' between the cargo barrier and the back of the fridge.
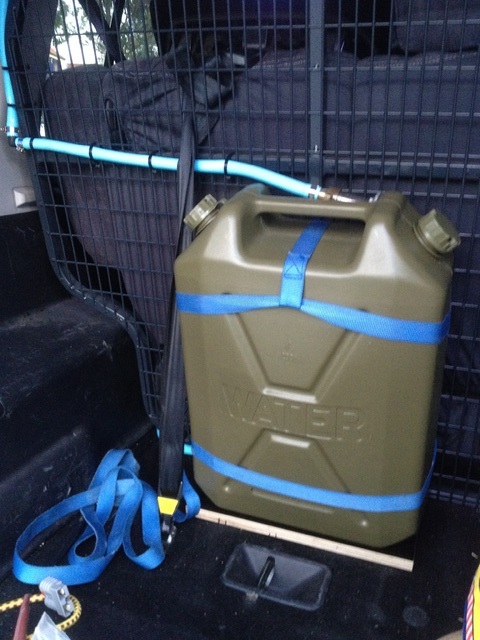

                        I like to keep thinks simple and reliable so there is no pump. Water simply drains via gravity. Outlet hose is routed between the back seat and wheel well. As per this picture, there is more than enough pressure to fill a drink bottle or wash the kids' feet after a trip to the beach. (Note that the outlet has a standard hose fitting to facilitate pressure filling. I did the tank in the NL in the same way. (Note the texts mark on the wheel arch - there are 4 marks that corspond to the tank's water letter - 1/4, 1/2, 3/4, and full)
                        Last edited by geopaj; 03-05-18, 08:45 PM. Reason: Postimage links updated
                        Silver NT VRX Di-D

                        ARB bullbar | snorkel | Bushskinz & Boo’s guards | UltraGauge MX | 2" lift | Cooper AT3 LT's | dual battery | Superwinch X9 | 80ltr diesel tank | 22ltr water tank | aux trans cooler | MM Lockup Mate | GME UHF | locker/TC mod | SPV EGR | rear LED work light | rhino platform | ARB awning | rear drawers ... & plenty of scratches

                        My Build Thread - HERE

                        Previously - NL Pajero (now owned by Forum member 'Gemster')

                        Comment

                        • geopaj
                          Valued Member
                          • Jul 2007
                          • 2756
                          • Adelaide

                          #42
                          DIY Rear drawers - Step 2 (making the frame/carcass)

                          I started by welding up a frame for, what will become the fridge slide, to exactly fit the bottom of the fridge. (Yep, I'm scratch building the fridge slide too )


                          Plywood base. Mounting points will be the 3rd row lower seat belt mounts and the 3rd row lower seat forward floor bracket. I am making the unit in LH & RH halfs for ease of fitting and removal. I have also cur reliefs to assess the small space on either side of the diesel sub tank (I plan to store stuff that I always carry but never plan to use such as spare radiator hoses & fan belts), and allows easy access to the wiring and plumbing of the diesel sub tank (in case of a breakdown while away).


                          LH (1/2 height) drawer carcass.


                          Both halfs of the carcasses finished. (Note that the child seat straps pass through holes in the top of the carcasses and attach to the factory child restraint anchors)
                          Last edited by geopaj; 03-05-18, 08:45 PM. Reason: Postimage links updated
                          Silver NT VRX Di-D

                          ARB bullbar | snorkel | Bushskinz & Boo’s guards | UltraGauge MX | 2" lift | Cooper AT3 LT's | dual battery | Superwinch X9 | 80ltr diesel tank | 22ltr water tank | aux trans cooler | MM Lockup Mate | GME UHF | locker/TC mod | SPV EGR | rear LED work light | rhino platform | ARB awning | rear drawers ... & plenty of scratches

                          My Build Thread - HERE

                          Previously - NL Pajero (now owned by Forum member 'Gemster')

                          Comment

                          • Noise
                            Member
                            • Aug 2011
                            • 77
                            • Albany

                            #43
                            Really enjoy seeing your mods mate. Very simple approach Keep em coming
                            Acquired
                            2011 NT Platinum Auto Diesel
                            Factory bells n whistles, Safari snorkel, Uniden uhf, Tekonsha electronic brake controller, Bushskinz intercooler and sump guards, 2.5 x 3m awning.

                            Traded
                            2.8td nj
                            arb bar, snorkel, spotties, ironman shocks, king springs, re-indexed torsion bars, cb, uhf, boost gauge, interior led's, reece, home made roof rack with rear facing led's and mounted high lift jack... so far

                            Comment

                            • geopaj
                              Valued Member
                              • Jul 2007
                              • 2756
                              • Adelaide

                              #44
                              DIY Rear drawers - Step 3 (carcass & fridge slide done)

                              Thank you to those who have responded to my thread. It's nice to have positive feedback and to know people are finding my projects interesting - I have certainly found other people's builds and projects interesting.


                              Finished the carcass, including covering with automotive carpet and aluminium edging.


                              Fridge slide has also been completed. The fridge slide is designed to lock both when closed (obviously 
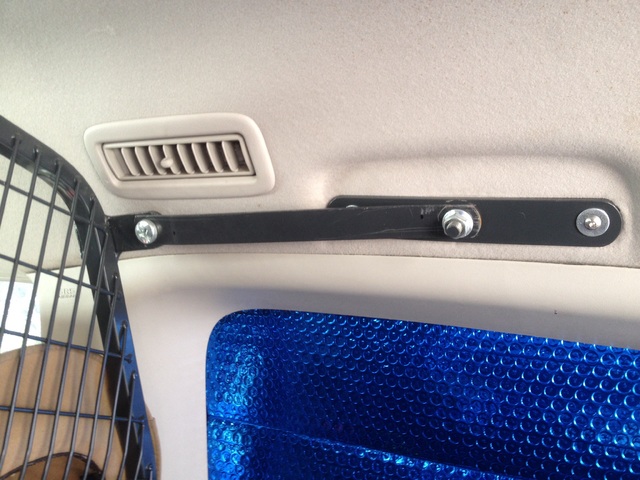
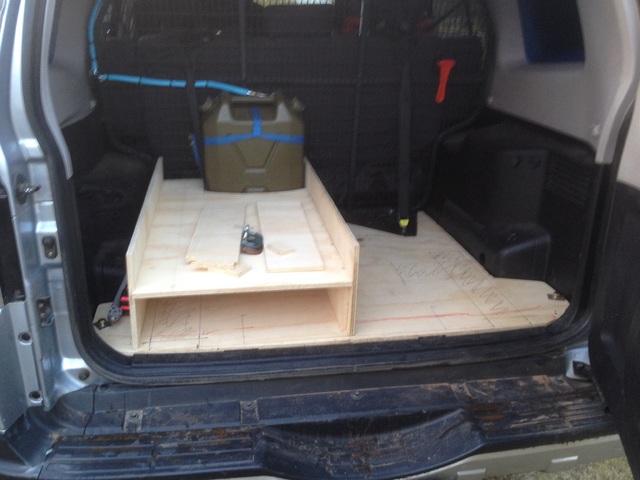
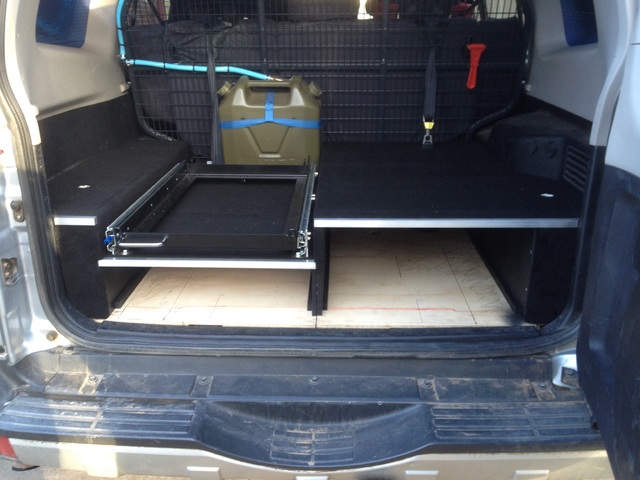
) and when fully extended, as well as being able to be operated single handedly (having to put your food down in the dirt/sand/mud so you can use both hands to open/close the fridge slide sucks royally).
                              For this project I am using slides from UES (http://uesint.com/products/). I have used UES slides for other projects previously and have always found them to be good quality. Some of the commercial drawer manufacturers in Adelaide also use UES slides. As an added bonus, when bought from their local 'face-to-face physical' shop, their slides are cheaper the the cheapest poor quality slides on eBay!
                              I used full extension locking slides that I modified by completely removing the locking assembly from the right hand slide (this idea I copied from some of the commercial fridge slides I looked at). The slides are attached to the carcass top by using some of the left over aluminium angle from the roof rack mount I made earlier.
                              I also build the fridge slide to incorporate a small slide out table/work area (which I made from a formply off-cut which I edged - for those that don't know, formply has a nice smooth black finish which is very durable and looks similar to Laminex). I will photograph this later in the build as with everything being black, it's hard to photograph.


                              I also added 'hatch doors' to the top of carcasses on both sides so that the space next to the wheel arches can still be used. It's a bit hard to see in this picture but the finger ring pull can easily be seen


                              I've just got the two drawer inserts to make now.
                              Last edited by geopaj; 03-05-18, 08:46 PM. Reason: Postimage links updated
                              Silver NT VRX Di-D

                              ARB bullbar | snorkel | Bushskinz & Boo’s guards | UltraGauge MX | 2" lift | Cooper AT3 LT's | dual battery | Superwinch X9 | 80ltr diesel tank | 22ltr water tank | aux trans cooler | MM Lockup Mate | GME UHF | locker/TC mod | SPV EGR | rear LED work light | rhino platform | ARB awning | rear drawers ... & plenty of scratches

                              My Build Thread - HERE

                              Previously - NL Pajero (now owned by Forum member 'Gemster')

                              Comment

                              • birdd
                                Senior Member
                                • Mar 2014
                                • 386
                                • Bundaberg, QLD

                                #45
                                Where did you get your carpet? and did you wrap it around the edges of the hatches etc? I need to carpet my fridge slide/box.
                                2008 MY09 Pajero NT GLX
                                MM Alloy Bullbar, MM Sidesteps, MM Tow Bar, Bushskinz Intercooler and Sump Guards, Pioneer Platform, Supa-Peg Supa Wing Deluxe 270 Awning, 2x2.5m Kalahari Awning, 23" 144W CREE LED Light bar, Uniden UH8080NB, eBay Reversing Camera, Sony XAV-AX100 6.2" CarPlay/Android Auto Headunit, MM/Milford Cargo Barrier, Torqit Pedal Torq, Dual Battery (CTEK D250S Dual, PowerSonic 120AH AGM)

                                Comment

                                Matched content

                                Collapse
                                Working...
                                X