Below Nav Bar

Collapse

Cargo Barrier Mounting Points

Collapse
X
 
  • Filter
  • Time
  • Show
Clear All
new posts
  • Kiwipride
    Junior Member
    • Jun 2012
    • 41
    • Gold Coast

    Cargo Barrier Mounting Points

    Hi All

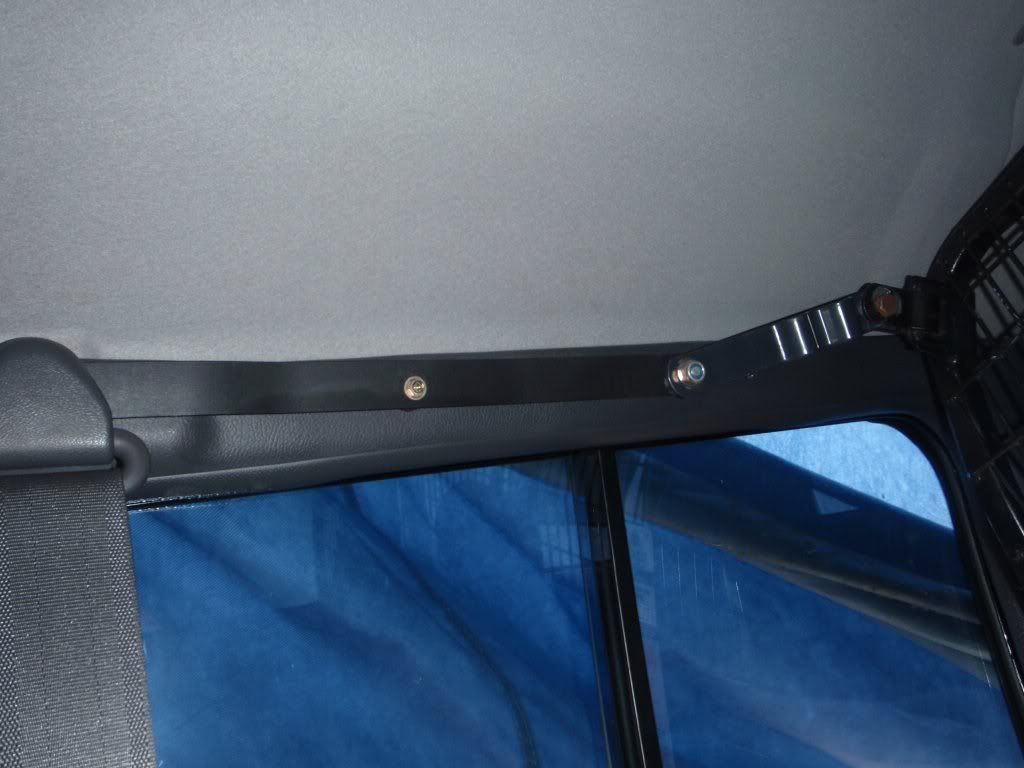
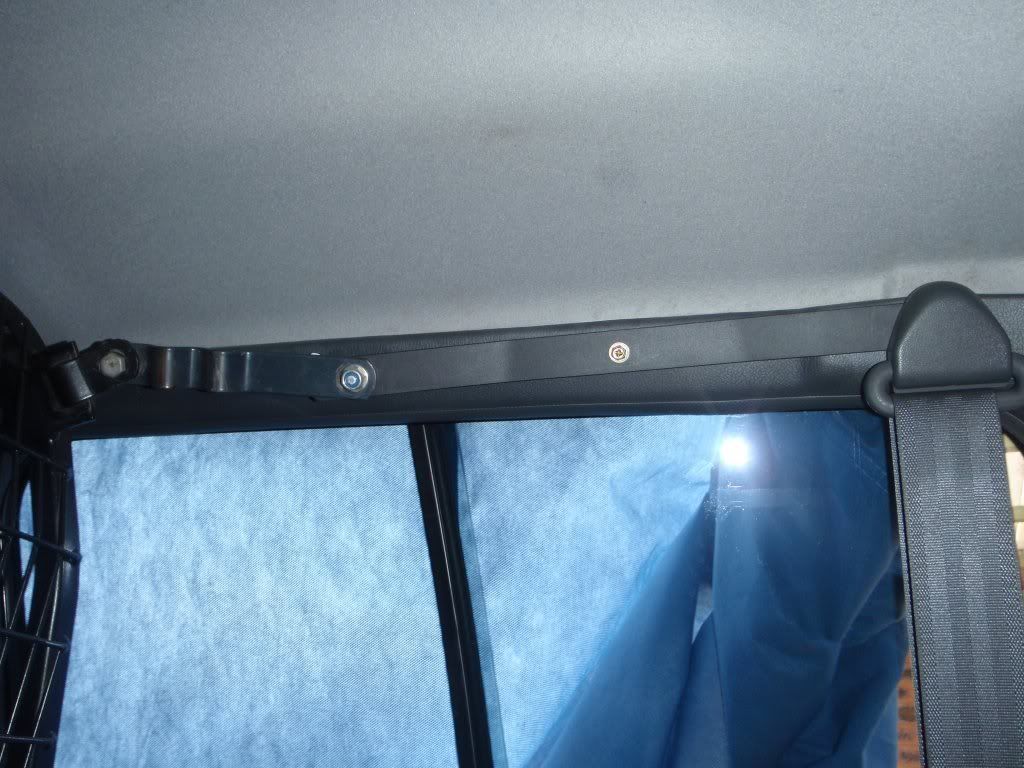
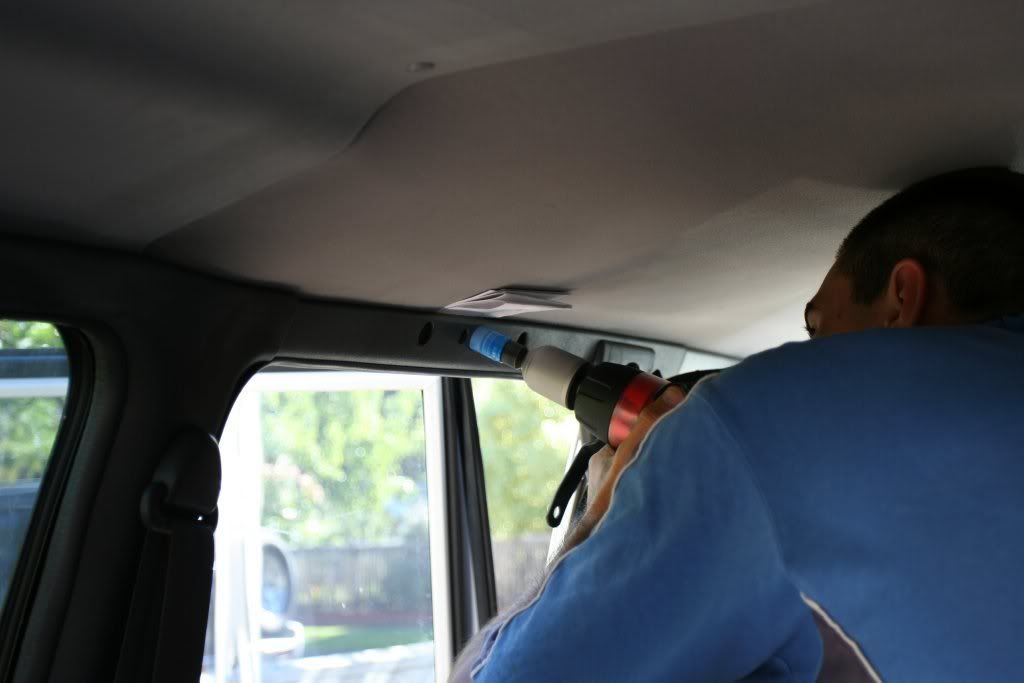
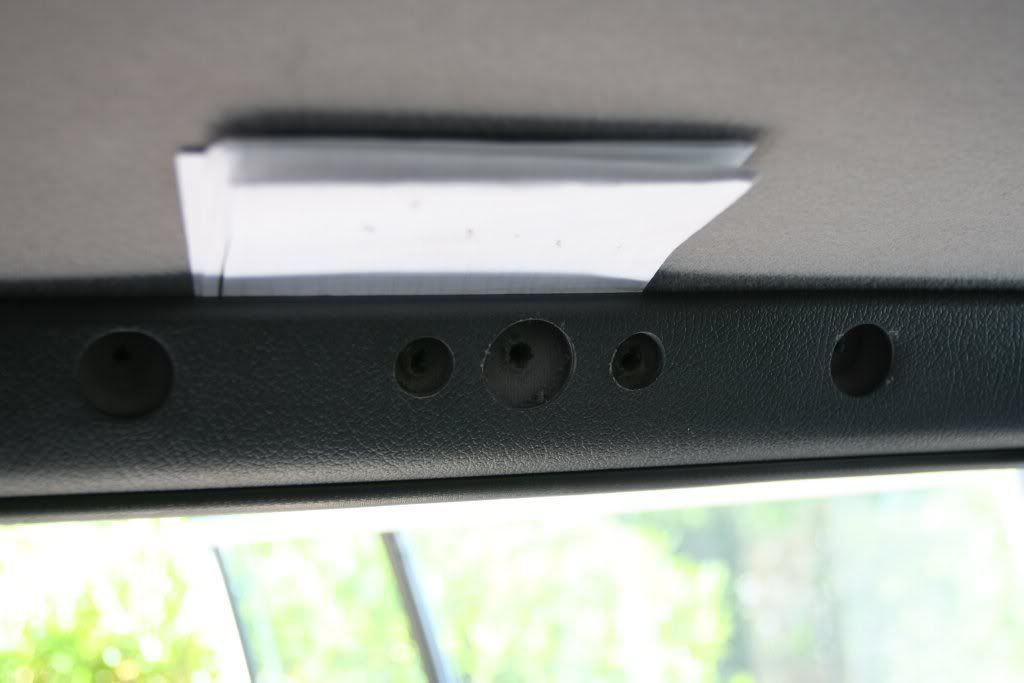
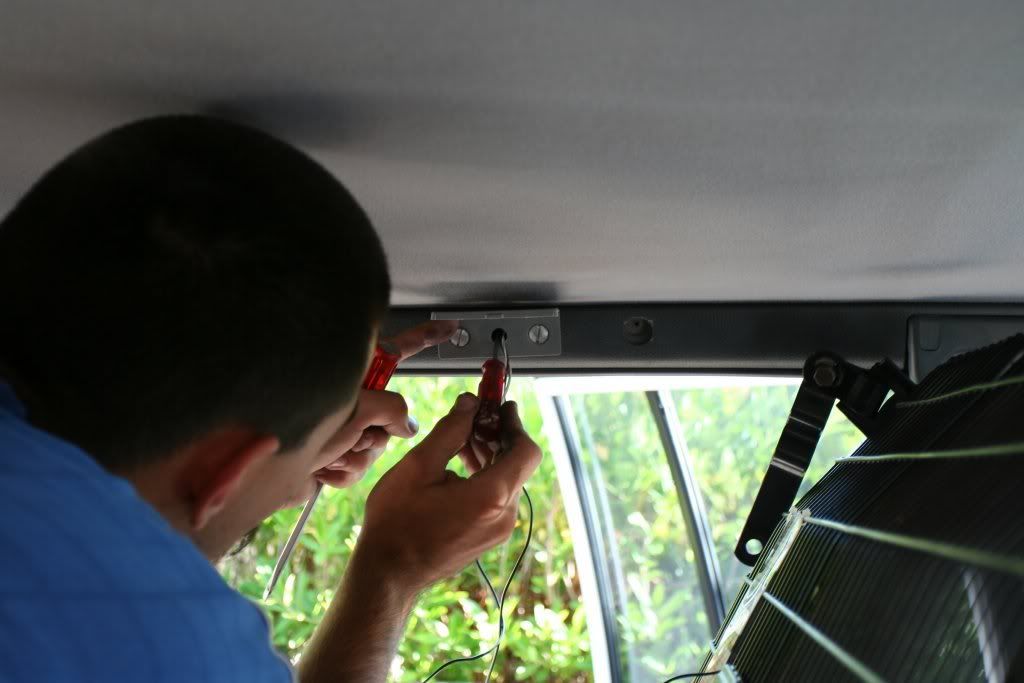
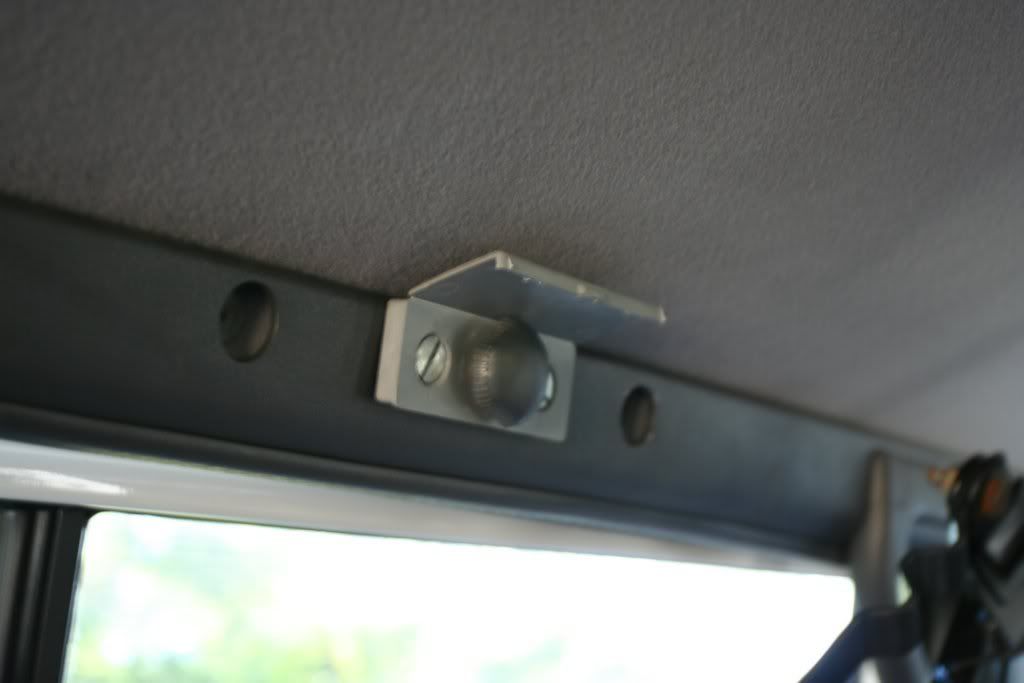
    Would anyone know where the mounting points are for a cargo barrier on a 1991 nh lwb? I seem to be struggling finding the top ones.

    Thanks in advance!
  • Barneymutt
    Valued Member
    • Sep 2007
    • 874
    • Regents Park. Qld

    #2
    I'm pretty sure they utilize the grab handle mounts.

    Comment

    • Kiwipride
      Junior Member
      • Jun 2012
      • 41
      • Gold Coast

      #3
      Ok, Thanks. I'll check it out.

      Comment

      • rmonson
        Member
        • May 2008
        • 102
        • country Victoria

        #4
        Cargo Barrier

        We have an NK, and the barrier is fixed to the front bolt on the grab handles.
        NW MY 14 VRX, Lovells / Koni HD 40mm lift, LRA 58 litre aux tank, Bushskinz x4 and side steps, TowPro, Redarc BCDC 1225, Optima Blue top aux battery on ARB tray, Tanami side by slide drawers, MMA tow bar, ARB deluxe bull bar, Runva 1200EWX winch, GME 4500s, 90 watt 150mm LED spot / flood combo, Airtec snorkel, RAM iPad mount (and iPad running Memory Maps - Hema and Tom Tom), Projecta dual battery monitor, ScanGuageII, ARB compressor

        Comment

        • m1s3ry
          Valued Member
          • Jun 2007
          • 773
          • Kalorama, VIC.

          #5
          If it's a Milford one like mine it has special inserts that go in front of the grab handles, bolting it to the first handle bolt would have it sitting back too far at the top. Also the bolt would not strong enough for the rating of the cargo barrier.
          Steele Perkins (#1263)
          NP Pajero with added goodness..

          Comment

          • Kiwipride
            Junior Member
            • Jun 2012
            • 41
            • Gold Coast

            #6
            Yes, I was looking at that today and thinking the handle is too far back.

            Comment

            • arrow
              Valued Member
              • Nov 2007
              • 628

              #7
              The grab handle mounting point is not rated for the cargo barrier. If you don't have the mounting hardware, you can buy the kits from Milford, but they aren't cheap - around $110 when I sourced them.

              Comment

              • Kiwipride
                Junior Member
                • Jun 2012
                • 41
                • Gold Coast

                #8
                So, what do these Milford kits mount too?

                Comment

                • arrow
                  Valued Member
                  • Nov 2007
                  • 628

                  #9
                  There is a bit of drilling involved, but if you follow the instructions and go slowly it isn't a difficult job. You effectively mount a plate behind the upper metalwork above the window line (the plate acts as a reinforcement) and the cargo barrier bolts screw into that plate.

                  My son and I did it to mount his barrier without any dramas.

                  Comment

                  • Alex86
                    Valued Member
                    • Jul 2007
                    • 2416
                    • Here and there

                    #10
                    I'll hunt thru the hard drive and try find some more pics, but at the moment I've found these....


                    That is the rear, top mounting of my Milford barrier in the NL.

                    What I have done is utilised the seat belt mount (rated to take a person, should be good enough for the barrier!) and cut and fitted some 3mm steel to the seat belt mount, and the length puts the barrier in a position that I want.

                    The screw in the middle of the steel strap is using the grab handle mount, and its just there to help position the strap. If the barrier gets "used", i know that the screw is going to break, no biggie.

                    The strap is then connected to the genuine cargo barrier mount- the squiggly steel bit, via high tensile bolt and nyloc nut. The squiggly bit of steel, in theory, should stretch when the barrier takes a load.
                    The squiggly bits are also used for the forward mounting position (and also on the bottom mounts, forward and back positions).


                    Reason why I didnt drill the Milford system into the rear is that I want to minimise holes drilled into the car.
                    I did however, drill for the Milford forward top mounts, and I will try find these photos (if i took them) and get them posted here for you ASAP (expect tomorrow if I do have the pics).
                    '99 NL Escape, Manual - Bullbar, roofrack, cargo barrier, D697LT, Tough Dogs, dual batts, rear draws, Narva 225 HID, UHF, led bar etc
                    Towing: 4.8m Savage Centurion half-cab w/75hp Mariner

                    '99 NL GLS SWB, Auto - Bullbar, D697LT, spotties, UHF, Koni adjustables & King springs.

                    Wanted: Adventure.

                    Comment

                    • Alex86
                      Valued Member
                      • Jul 2007
                      • 2416
                      • Here and there

                      #11
                      Drilling the forward, upper mounts


                      Holes in the plastic sorted. The two most outer ones are the original grab-handle mounts. The three central ones are for the bracket- the large centre hole gets the holesaw treatment you see above, and the outer two are for the screws to mount the bracket in position.


                      Can't remember the exact installation method, but there is a metal bracket that got inserted thru the largest (centre) hole, the wires are hanging onto it so it doesnt get lost inside the bodywork. Stick the screwdriver in, locate the holes and use the two silver screws to fix the bracket in place. Do not remove the wire until its fixed in place, just in case!


                      Ready for use. The big hand-screw doesnt always live there. Can be removed and stored, the cover folded down and the grab-handles replaced to neaten it all back up.

                      Last edited by Alex86; 29-07-12, 01:51 AM.
                      '99 NL Escape, Manual - Bullbar, roofrack, cargo barrier, D697LT, Tough Dogs, dual batts, rear draws, Narva 225 HID, UHF, led bar etc
                      Towing: 4.8m Savage Centurion half-cab w/75hp Mariner

                      '99 NL GLS SWB, Auto - Bullbar, D697LT, spotties, UHF, Koni adjustables & King springs.

                      Wanted: Adventure.

                      Comment

                      • Kiwipride
                        Junior Member
                        • Jun 2012
                        • 41
                        • Gold Coast

                        #12
                        Wow! Thanks Alex for thanking the time to upload your pictures. Will help heaps. Although $110 for those brackets is very steep.

                        Comment

                        • arrow
                          Valued Member
                          • Nov 2007
                          • 628

                          #13
                          Need to check on that price, it was a year or two ago!!!

                          If you are going to mount the barrier only in the rear position, then the strap method from the rear seat belt mounting point would work. As he mentioned, Alex86 set his up so that the barrier can be moved forward when the middle row of seats is down and it is for that forward position where he used the Milford mounting blocks.
                          Last edited by arrow; 29-07-12, 10:41 AM.

                          Comment

                          • Alex86
                            Valued Member
                            • Jul 2007
                            • 2416
                            • Here and there

                            #14
                            No worries Kiwi.

                            The drill method gives you the "proper" mounting points and the added neatness of no straps etc; but the strap method lets you use original holes and not drill your car. Personal preference.
                            As you can tell my straps match the grey pretty well- I had some paint colour matched which has come in handy for several projects.


                            I beleive the drilling method for the rear mounts is the same as the front. I never looked into it.

                            From memory the kit was top & bottom mounting hardware; but whether or not it was forward or back only, or both forward and back I cannot remember. I'm pretty certain it wasn't $110 for each individual 'point' of fixing.
                            Worth checking out anyway.


                            I do not recall how the bottom mounts worked. I used the home made strap method from my first post. They are secured at the bottom using the forward tie-down points in the cargo area.
                            To move the barrier between forward and back positions, I have two different strap lenghts- one for the back position one for the front.
                            On top of that, the bottom also has the genuine squiggly straps.
                            '99 NL Escape, Manual - Bullbar, roofrack, cargo barrier, D697LT, Tough Dogs, dual batts, rear draws, Narva 225 HID, UHF, led bar etc
                            Towing: 4.8m Savage Centurion half-cab w/75hp Mariner

                            '99 NL GLS SWB, Auto - Bullbar, D697LT, spotties, UHF, Koni adjustables & King springs.

                            Wanted: Adventure.

                            Comment

                            • arrow
                              Valued Member
                              • Nov 2007
                              • 628

                              #15
                              Re Alex86's last post, that price was for a pair of upper mounting blocks. The lower "squiggly" straps that come with the barrier are designed to mount straight underneath the forward cargo point on the floor, nothing more needed (except for possibly a longer bolt, can't remember).

                              Comment

                              Matched content

                              Collapse
                              Working...
                              X